This Instant Pot yogurt recipe is one of the easiest ways to make homemade yogurt right in your own kitchen! The Instant Pot does all the work of holding a steady temperature, making the process simple and hands-off. All you need is milk and a small amount of plain yogurt to use as your starter, either from the store or from a previous batch. With just those two simple ingredients, you can make thick, creamy yogurt that tastes fresher and better than anything you'll find at the store.
One of the things I love most about making Instant Pot yogurt is how versatile and budget-friendly it is. With a gallon of milk, you can make a big batch of yogurt at home for a fraction of the cost of store-bought.
You can enjoy the yogurt as-is, or strain it for thick Greek-style yogurt and use the leftover whey in other recipes, like my insanely delicious fermented whey soda, baked goods, or other homemade staples.
Why you'll love this easy recipe
- Simple ingredients. Made with just whole milk and a ¼ cup of plain yogurt as a starter.
- Hands-off process. The Instant Pot keeps a steady temperature so you don't have to babysit it.
- Budget-friendly. Make a large batch of yogurt at home for just the cost of a gallon of milk! That's a fraction of what you'd spend on good quality store-bought yogurt.
- Thick and creamy. Once finished, the yogurt has the consistency of traditional yogurt, but I love to strain out some of the whey for thick, Greek-style yogurt.
- Bonus whey. Don't toss the leftover whey - use it to make my favorite whey soda or in baking.
Ingredients
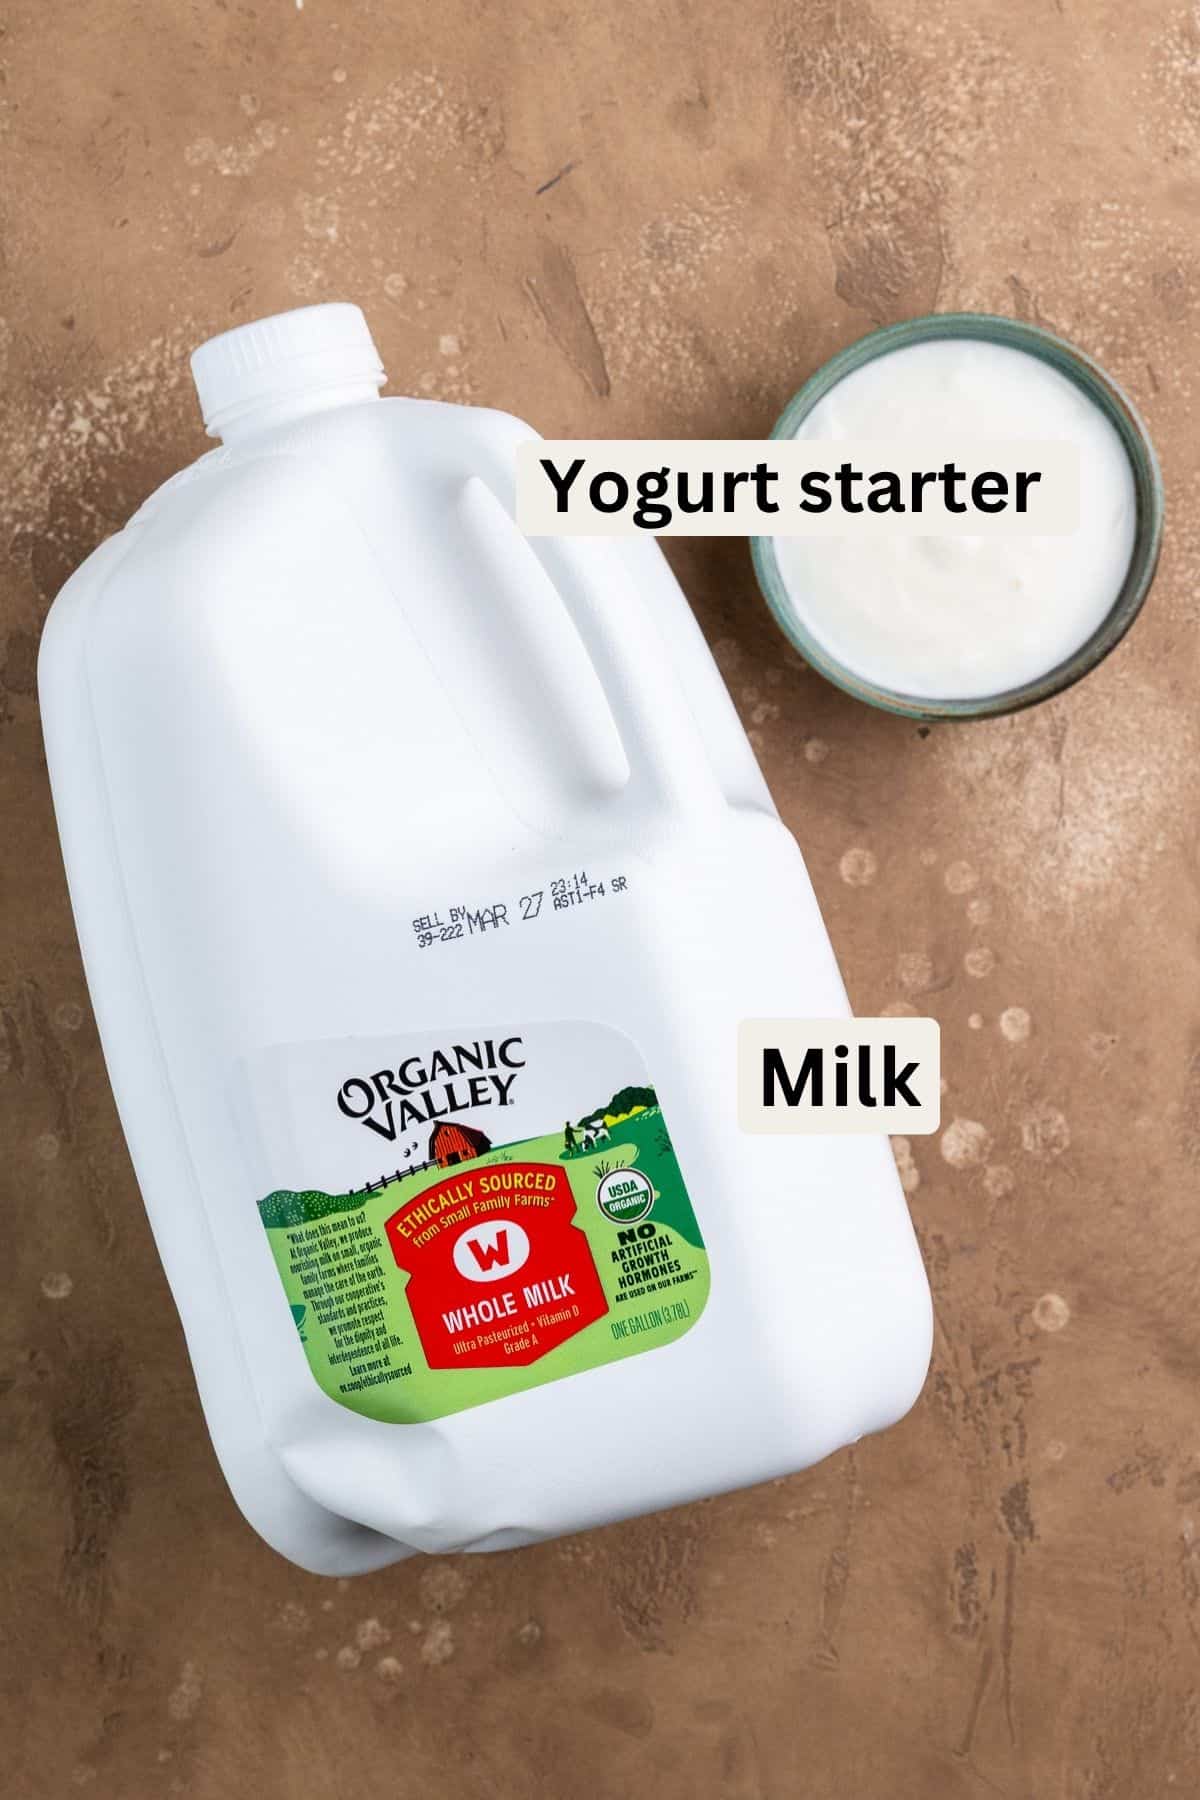
One of the best things about homemade yogurt is that you only need two simple ingredients:
- Milk: Whole milk will give you the creamiest results, but you can use 2% milk if preferred. I've only tested this recipe with whole milk, and I like to use organic whole milk. You can use raw, pasteurized or ultra-pasteurized milk.
- Yogurt starter: Use only plain, unsweetened yogurt with live cultures, as this is what allows the milk to ferment and thicken into yogurt. The most common cultures are Lactobacillus bulgaricus and Streptococcus thermophilus. You can use store-bought yogurt to get started, then set aside about ¼ cup from each batch to use as the starter for your next batch.
Scroll down to the recipe card for full ingredient list with measurements.
Kitchen equipment
You don't need much to make homemade yogurt, and once you get the hang of it, it becomes a simple, repeatable process.
- Instant Pot. An Instant Pot pressure cooker or any similar model with a yogurt function works well. I like that the Instant Pot has a stainless steel inner pot.
- Thermometer. You'll need a candy thermometer or instant-read thermometer is helpful for checking the milk temperature. You'll heat the milk to 180°F, then let it cool to around 110°F before adding your yogurt starter.
- Fine mesh strainer + cheesecloth (optional). Layer the cheesecloth inside the strainer to strain the yogurt and make thick, Greek-style yogurt.
- Large bowl (optional). Place a large bowl under the strainer to collect the whey as the yogurt drains.
How to make yogurt in your instant pot
Scroll down to the recipe card for full instructions.
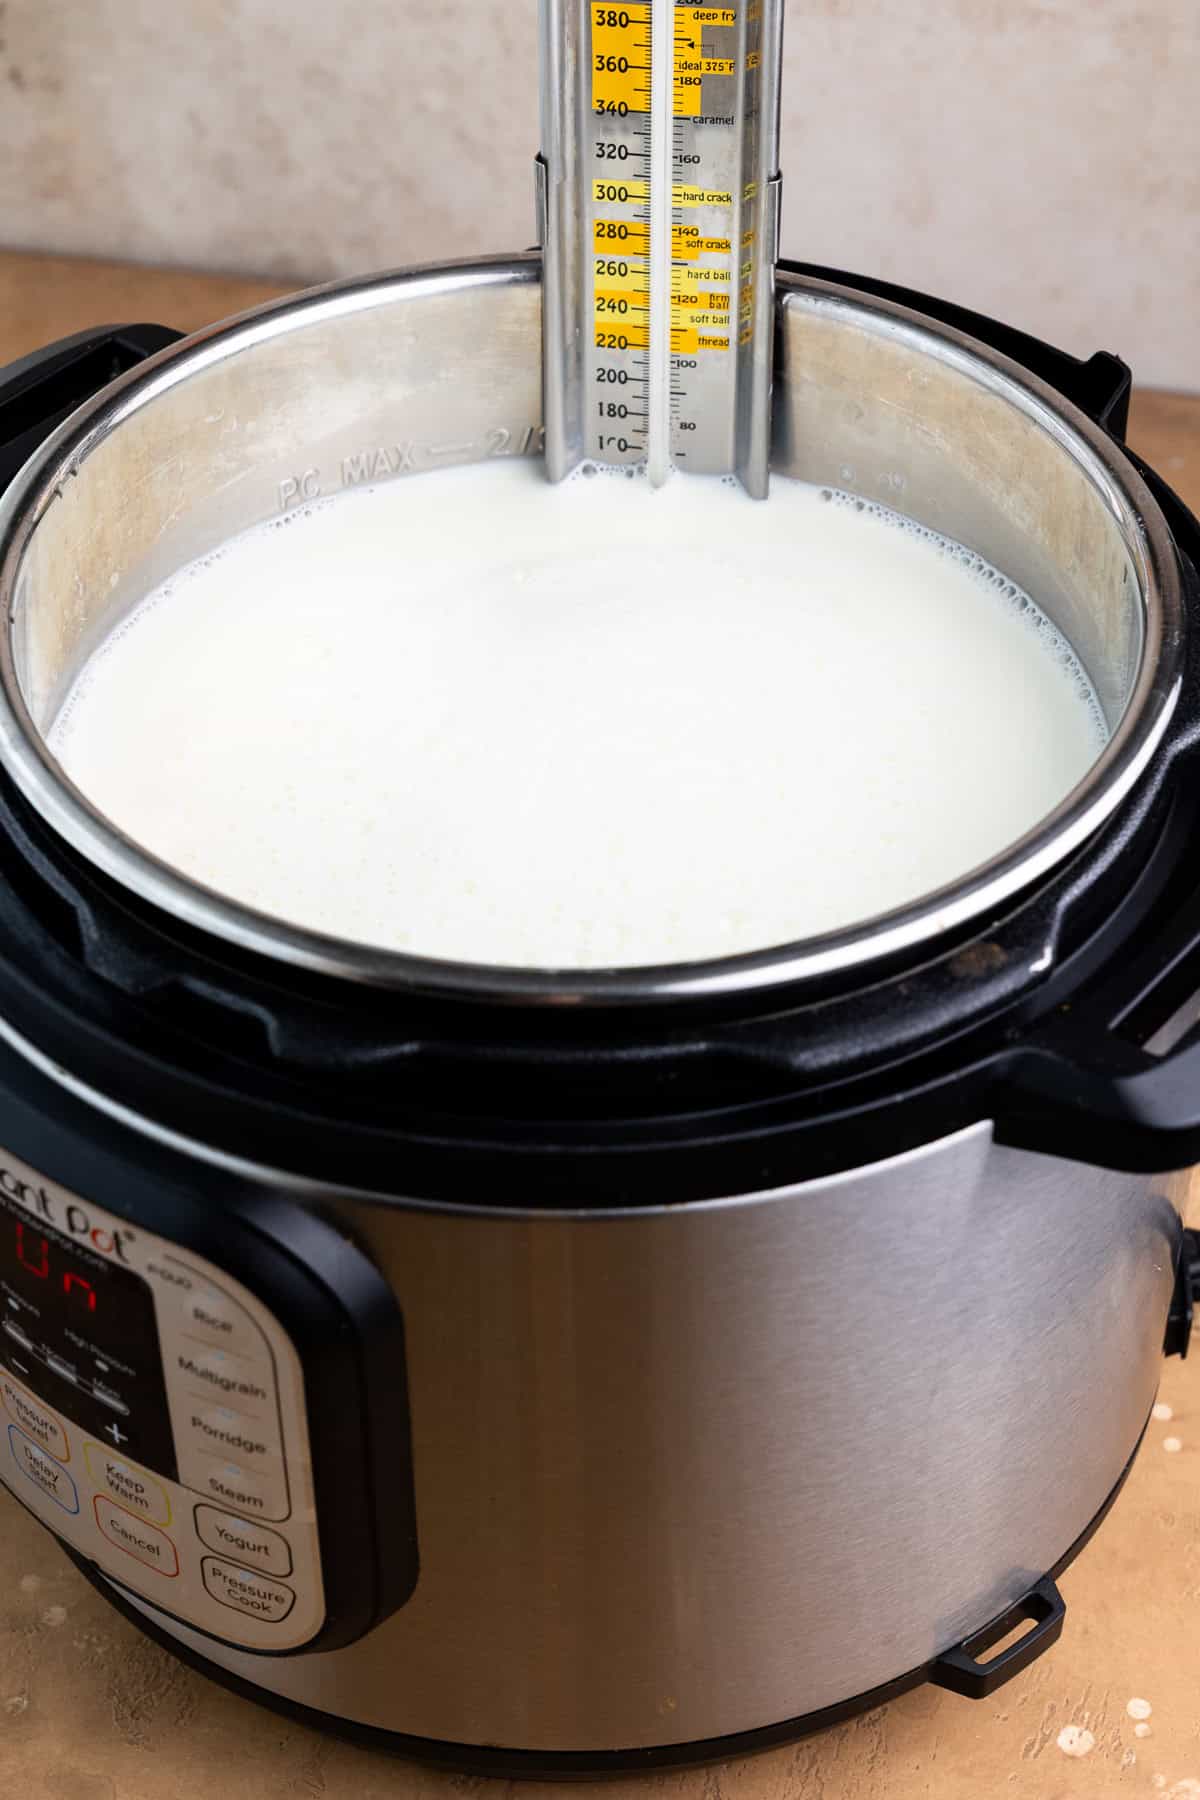
- Step 1: Heat the milk. Pour the milk into the Instant Pot. Press the "yogurt" button until the display reads "boil." Using an instant-read thermometer, check that the milk has reached 180-200°F.
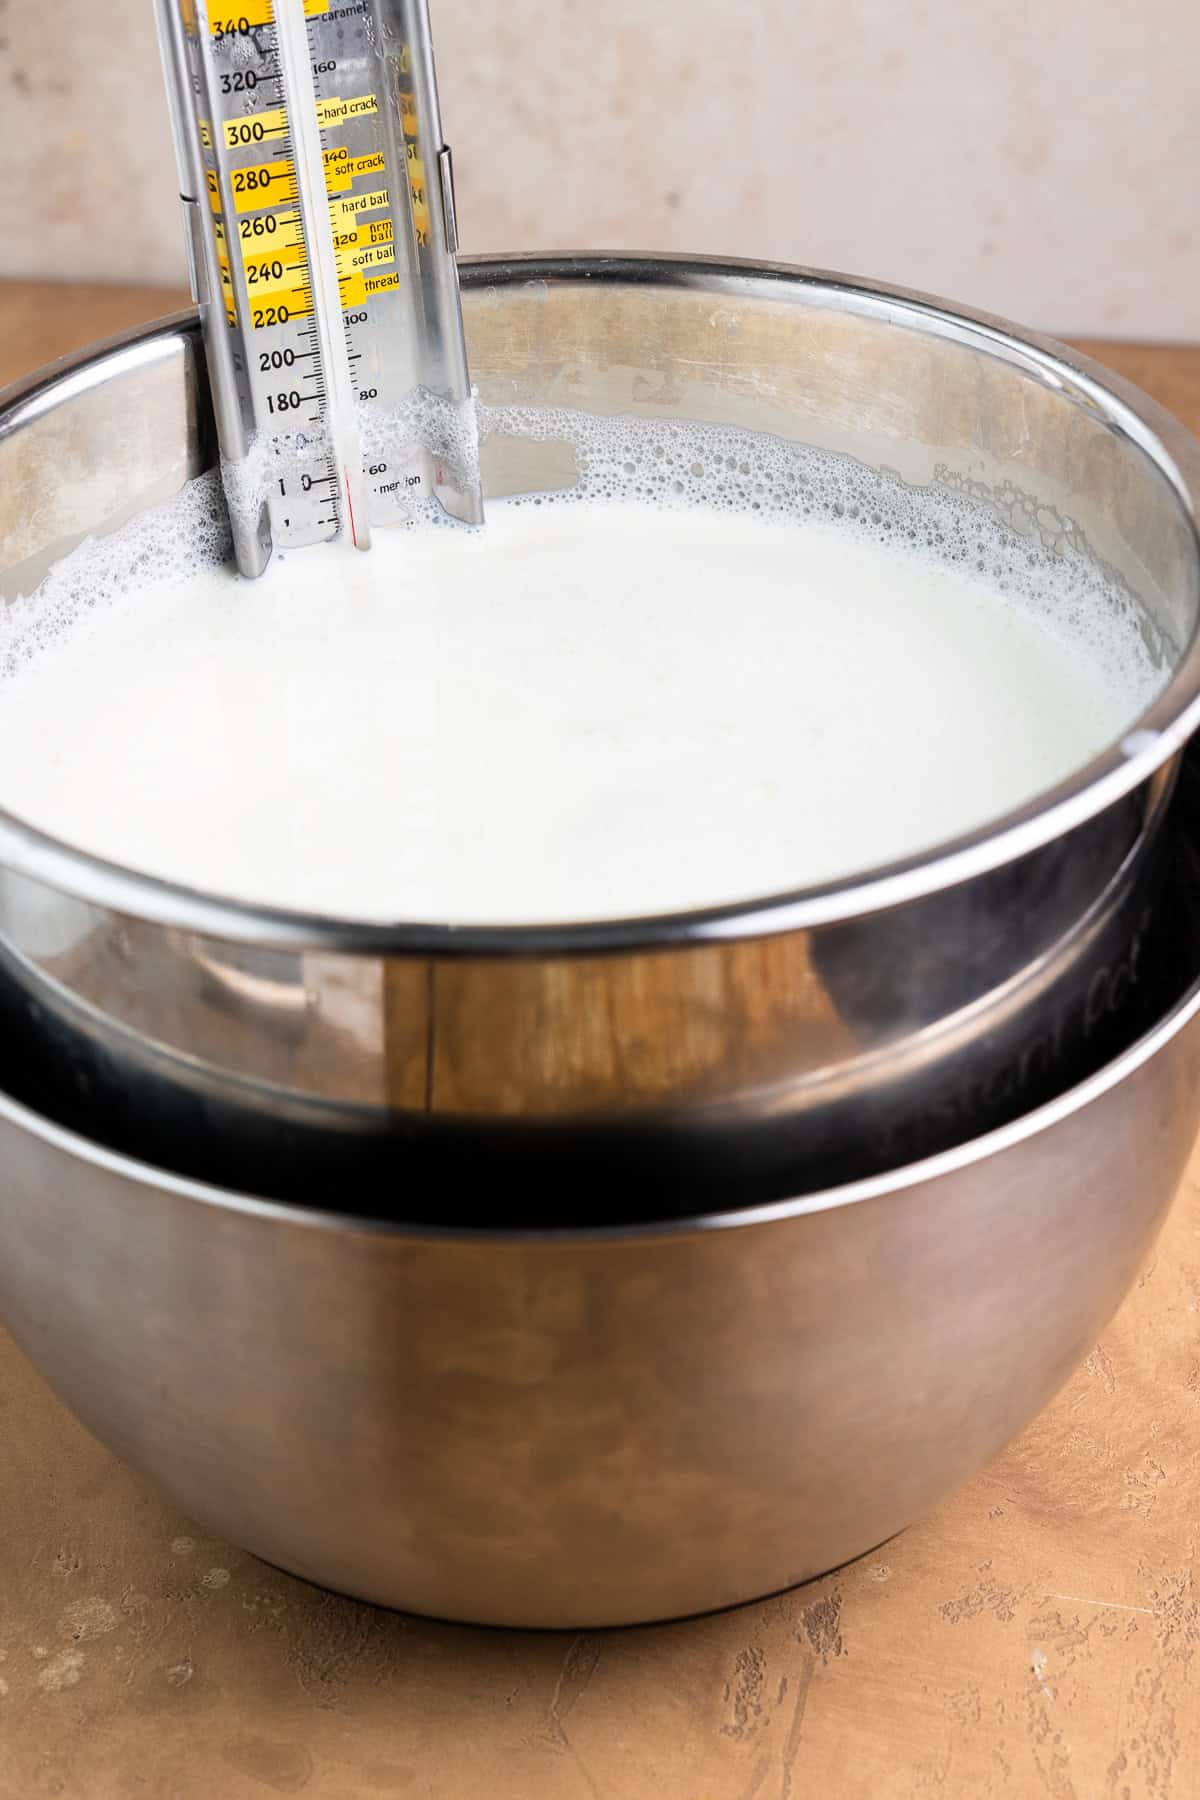
- Step 2: Cool the milk. Remove the inner pot from the Instant Pot and let the milk cool to about 110°F - if it's too hot, it can kill the beneficial bacteria.
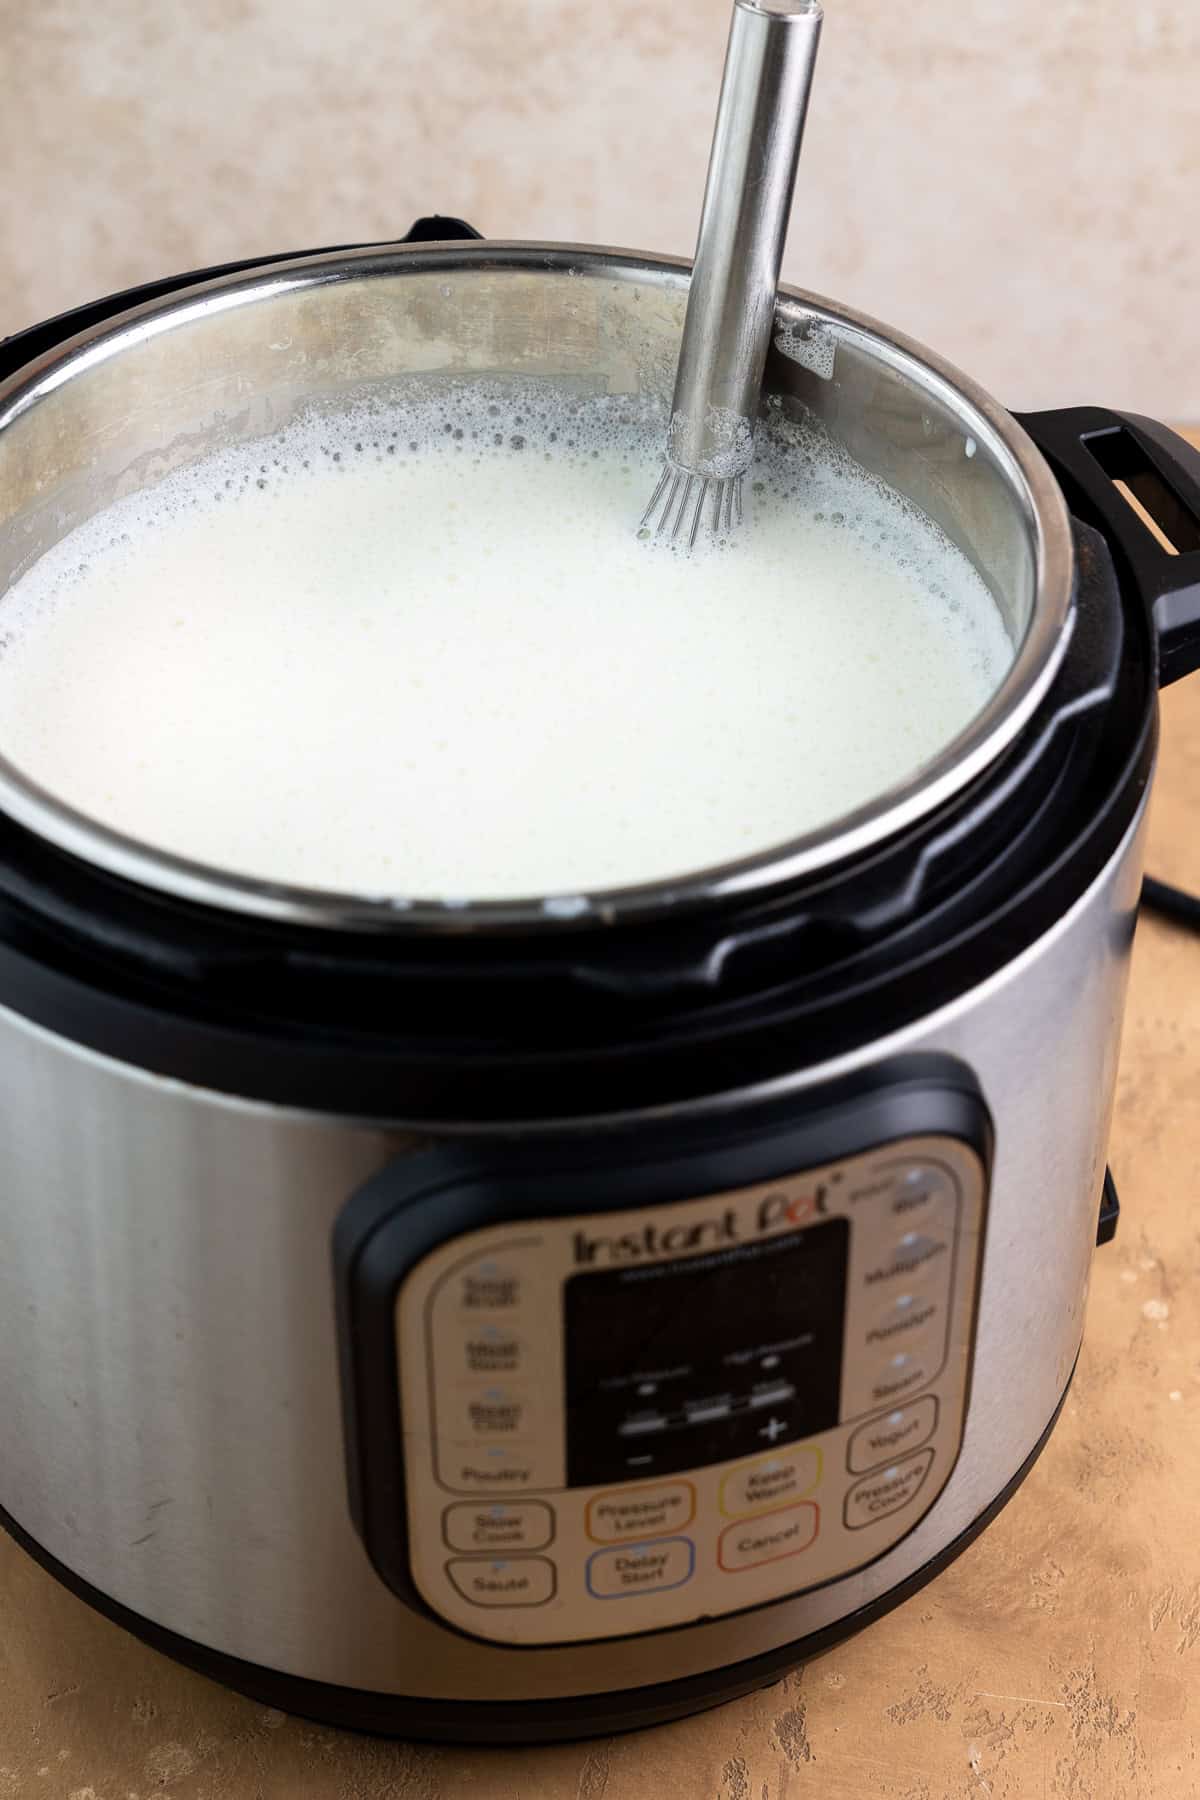
- Step 3: Add the starter. Whisk the yogurt starter directly to the cooled milk.
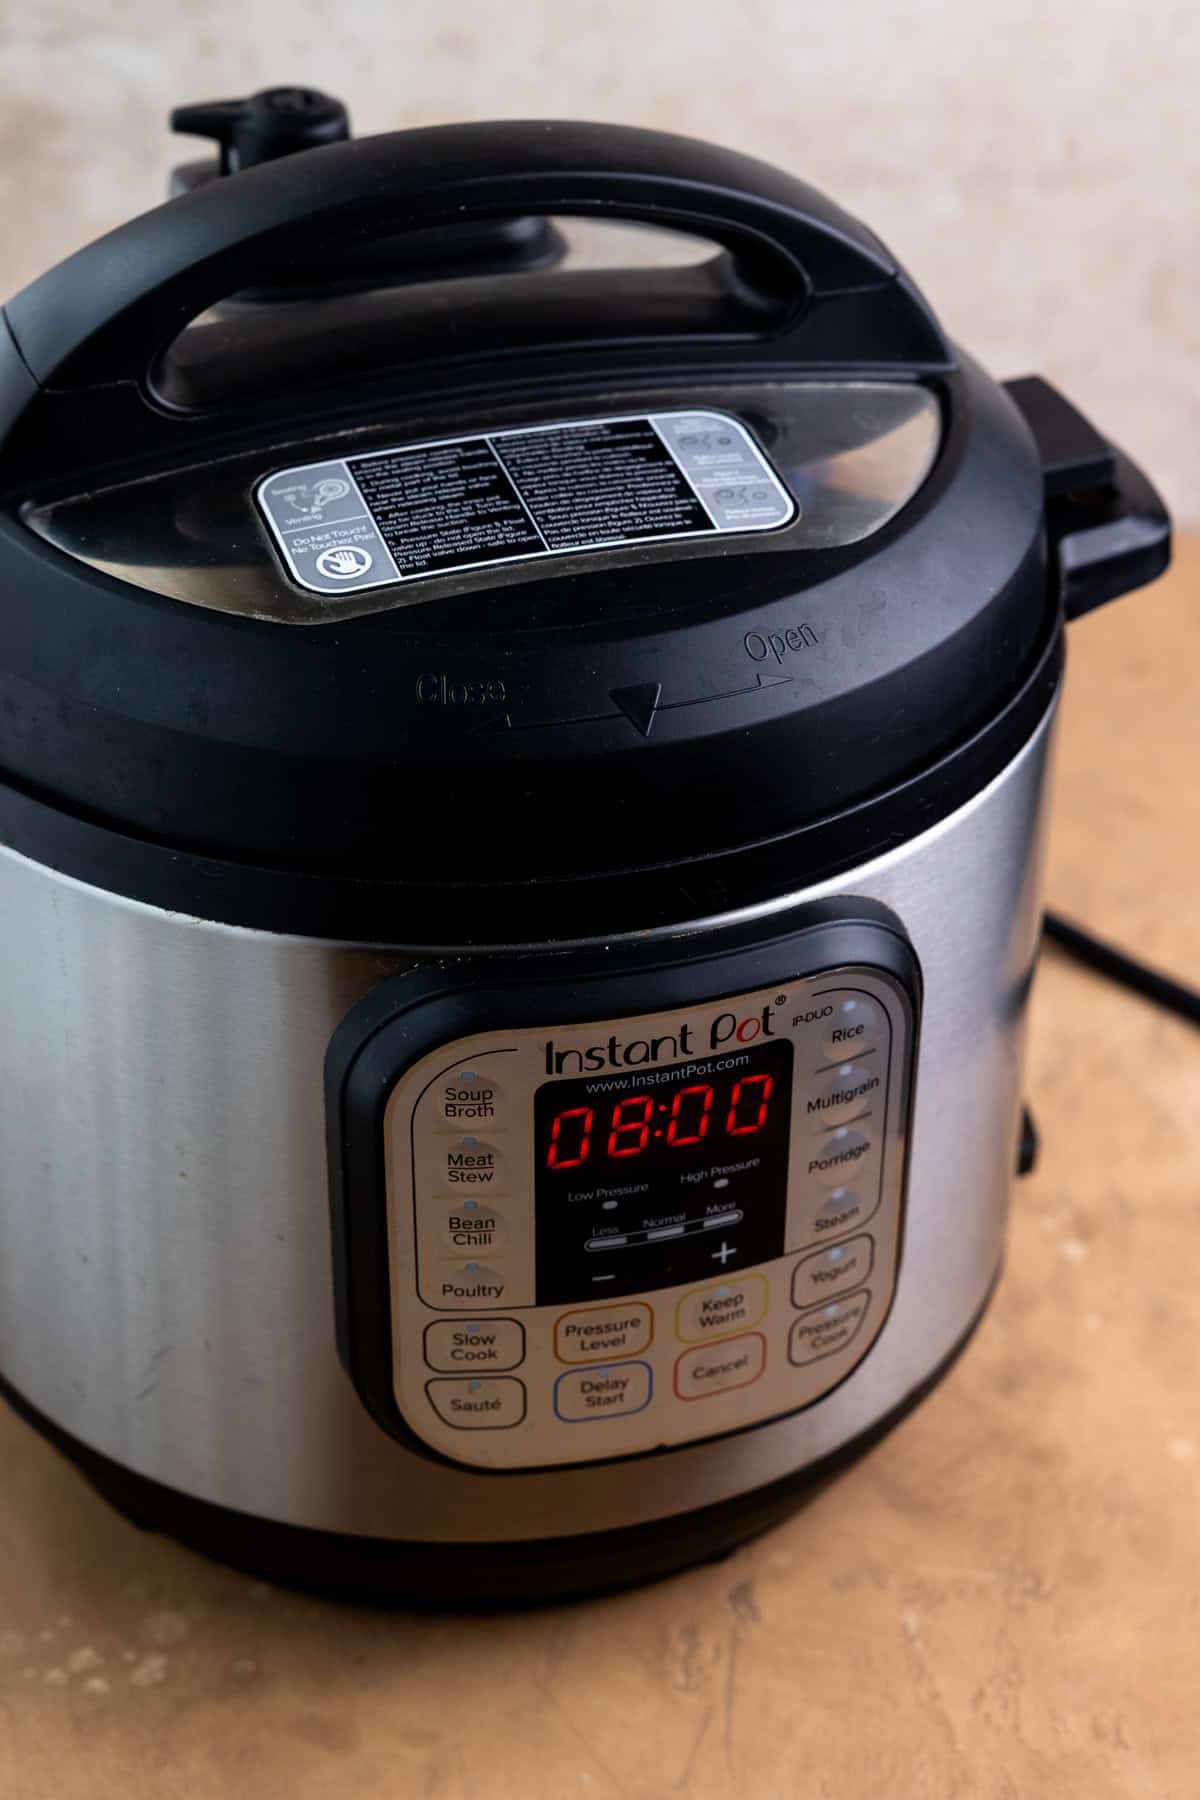
- Step 4: Incubate. Place the inner pot back into the Instant Pot and cover. Press the "yogurt" button and set timer for 8 hours. You can adjust the time up to 12 hours for a thicker, tangier yogurt.
- Step 5: Chill. Once the yogurt is done fermenting, remove the inner pot, cover with a lid or plastic wrap, then transfer to the fridge. Let chill for a few hours or overnight to fully set and thicken.
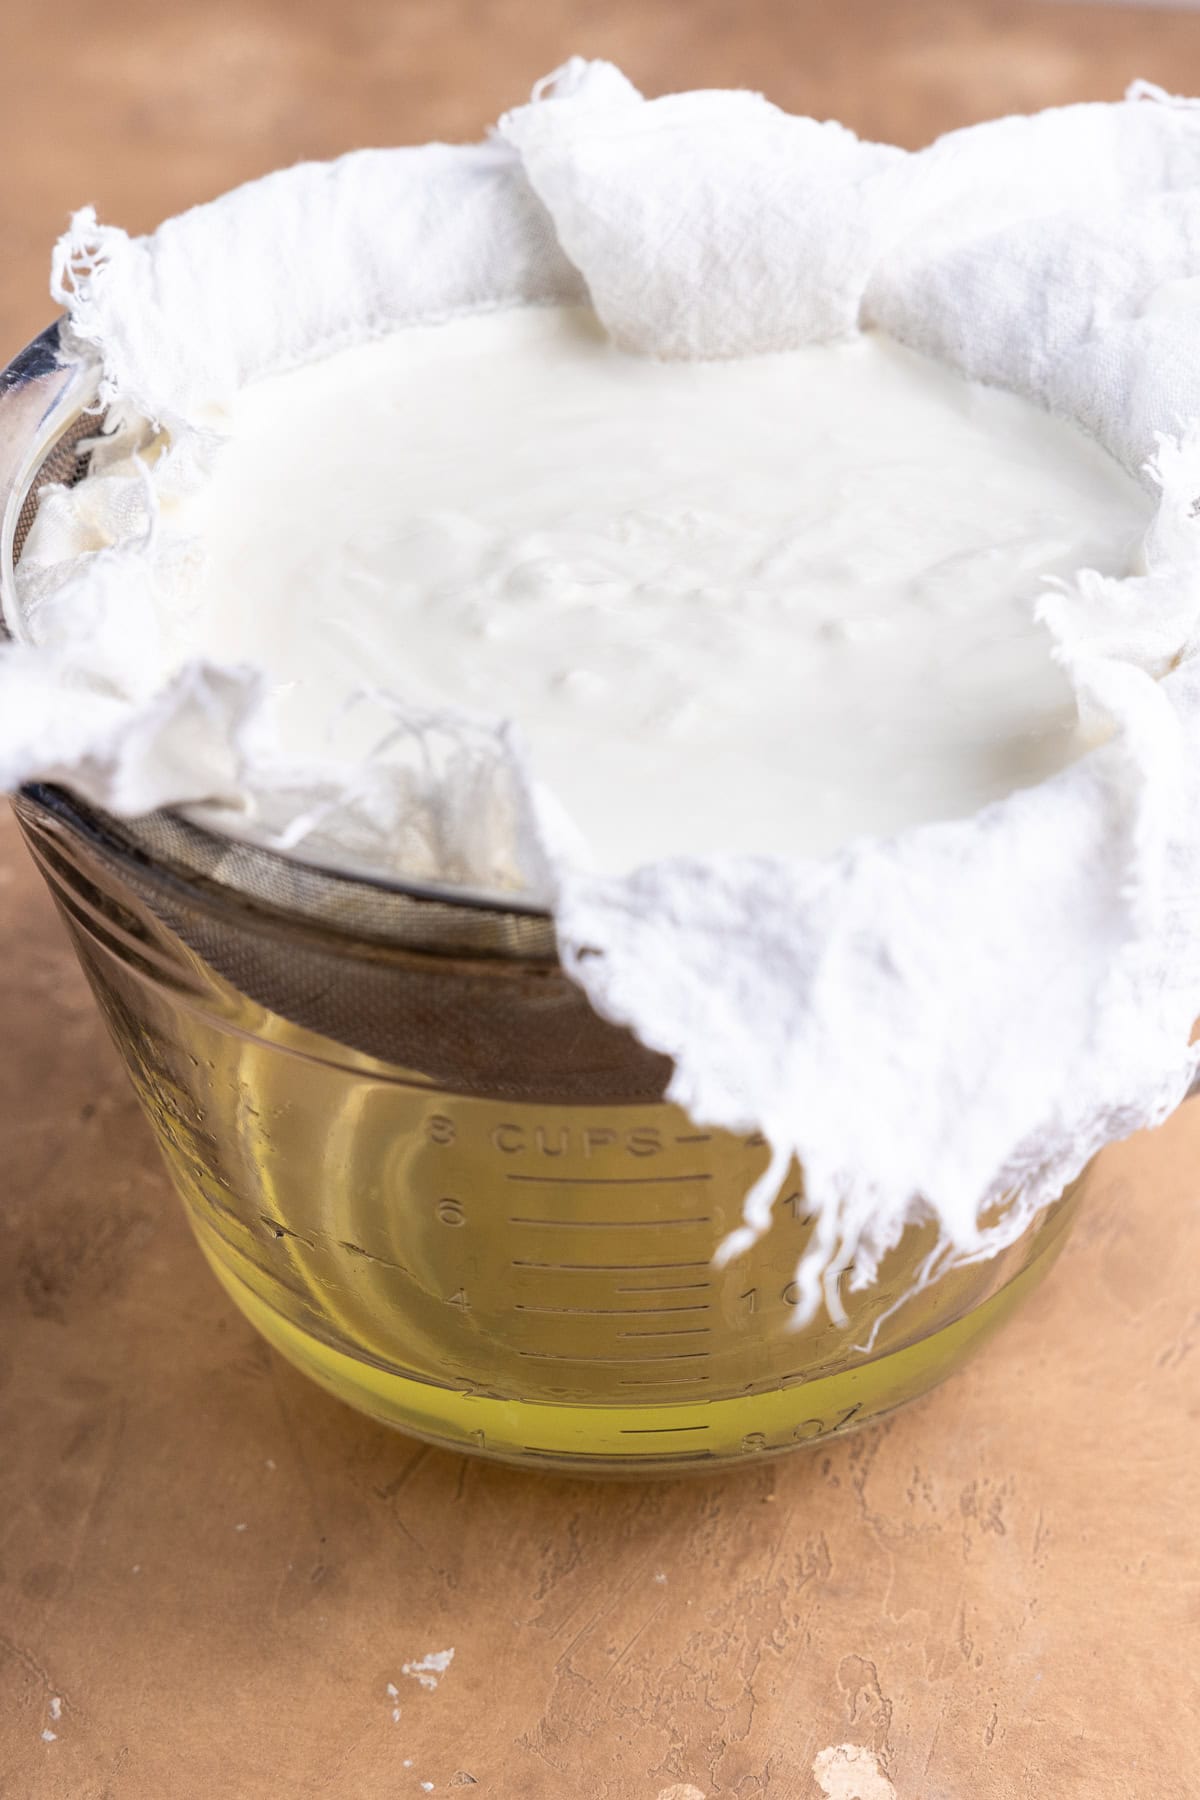
- Step 6: Strain (optional). For thicker, Greek-style yogurt, place a fine mesh strainer lined with cheesecloth over a large bowl. Transfer to the fridge and let it strain for 3-6 hours, depending on how thick you'd like it.
How to strain for thick Greek yogurt
I prefer a thicker, Greek-style yogurt. To achieve this, simple strain out some of the whey after the yogurt has finished fermenting and chilling in the fridge.
To strain the yogurt, place a fine mesh strainer over a large bowl and line it with cheesecloth. Pour the yogurt into the lined strainer, then transfer to the fridge and let it strain for a few hours, depending on how thick you'd like it.
As the yogurt drains, the liquid that collects in the bowl is whey. Don't discard it - this leftover whey can be used in a variety of ways, including homemade probiotic soda and baking.
- 2-3 hours: slightly thicker yogurt
- 4-6 hours: thick, greek-style yogurt
What to do with whey from yogurt
After straining your yogurt, you'll be left with a light yellow liquid called whey. Whey is nutrient-rich liquid that separates from the yogurt during straining and contains beneficial bacteria, protein, and minerals.
Instead of pouring it down the drain, there are several simple ways to use it in your kitchen.
One of my favorite ways to use leftover whey is to make fermented whey soda, a naturally fizzy, probiotic drink made with just whey and fruit juice. It's an easy way to turn something that would normally be discarded into something fun, refreshing and good for your gut.
You can also use whey in other everyday recipes, such as:
- Smoothies. Add a splash for a boost of protein and beneficial bacteria.
- Baking. Use it in place of some water or milk in pancakes, muffins, or bread.
- Soaking grains. Mix a couple tablespoons of whey into water to soak oats or grains before cooking, making them easier to digest.
- Fermented foods. Use it as a starter for simple vegetable ferments.
Tips for success
- Clean your Instant Pot. If your instant pot smells like something you previously cooked (like a savory dish such as Instant Pot Pork Roast), it's a good idea to give it a thorough cleaning. You can wash it well with soap, or add 1 cup of water and 1 cup of white vinegar to the pot. Seal and set to high pressure for 2 minutes. Rinse well and you're ready to go. You can also leave the sealing ring off when making the yogurt to prevent any lingering odors from affecting the flavor.
- Use fresh starter. For best results, use yogurt with active cultures that's fresh and hasn't been sitting open in the fridge too long.
- Heat the milk to 180°F. Heating the milk to 180°F helps change the structure of the proteins so the yogurt thickens properly and has a smoother, creamier texture.
- Cool to 110°F before adding starter. If the milk is too hot, it can kill the beneficial bacteria.
- Don't skip the whisk. Whisk the starter into the milk well so it's fully incorporated.
- Leave it undisturbed. Once the yogurt is fermenting, avoid moving, jostling or mixing the yogurt so it can set properly.
- Adjust fermentation time to taste. A shorter time (6-8 hours) will give you a milder yogurt, while a longer fermentation will be more tangy.
- Chill the yogurt. After fermentation, refrigerate the yogurt for at least a few hours to help it fully set and thicken.
- Strain for thicker yogurt. If you prefer a thicker, Greek-style yogurt, strain out some of the whey after fermentation.
Recipe FAQs
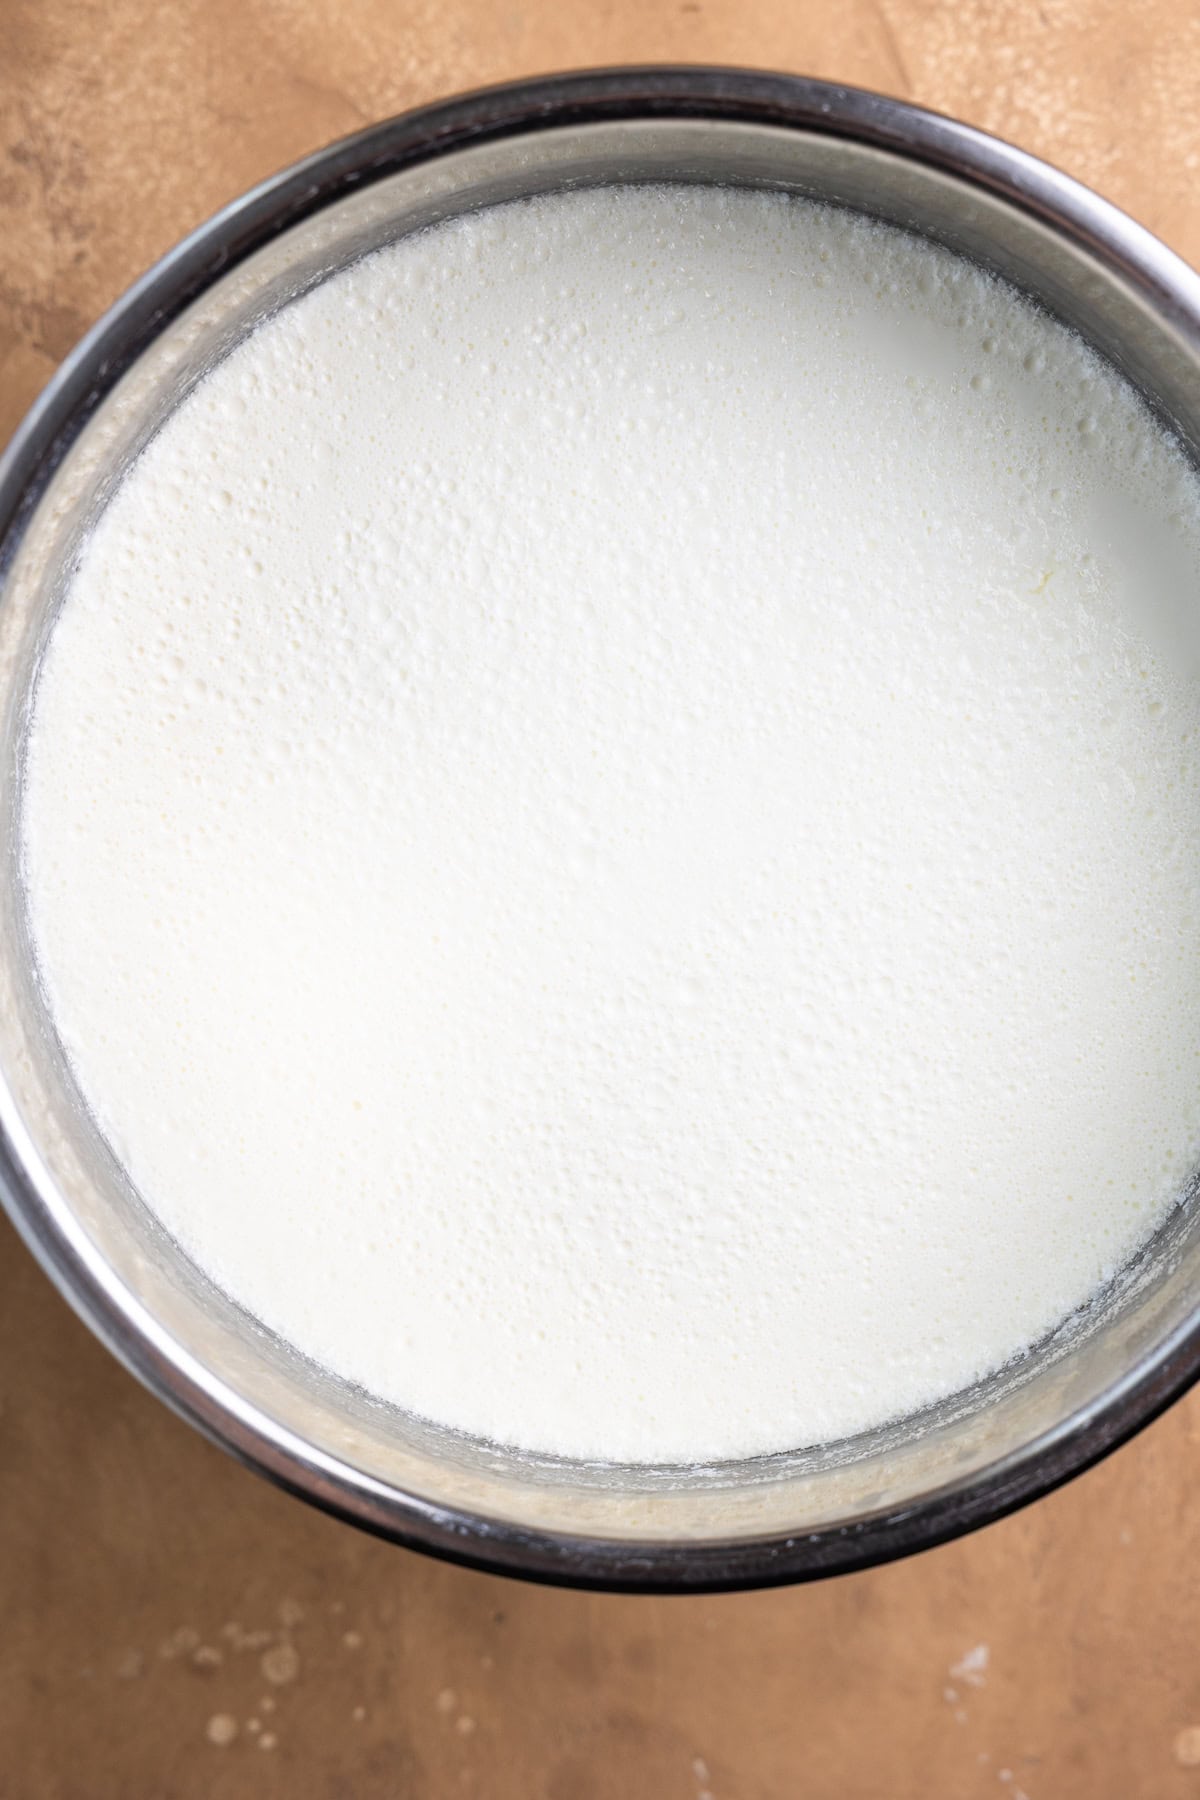
The yogurt should look set and thickened, and hold together as one mass.
This is usually due to inactive starter cultures or incorrect temperatures. Make sure you're using a plain yogurt without any additives and that contains live cultures, and that the milk is heated to 180°F then cooled to 110°F before adding the starter.
Yes, homemade yogurt in the Instant Pot is a great source of protein and beneficial bacteria that support gut health. It's also free from added sugars and unnecessary ingredients that can be found in store-bought yogurt.
Yogurt becomes more sour the longer it ferments. For a milder flavor, reduce fermentation time to 6-8 hours.
How to store
Store your homemade yogurt in an airtight container in the fridge for up to 2 weeks. I like to use glass mason jars.
Please note, as the yogurt sits, liquid (whey) may separate on top. Simply stir it back in before serving.
Don't forget: Set aside a ¼ cup of yogurt to use as a starter for your next batch. Store it in the fridge - I like to keep mine in a small mason jar.
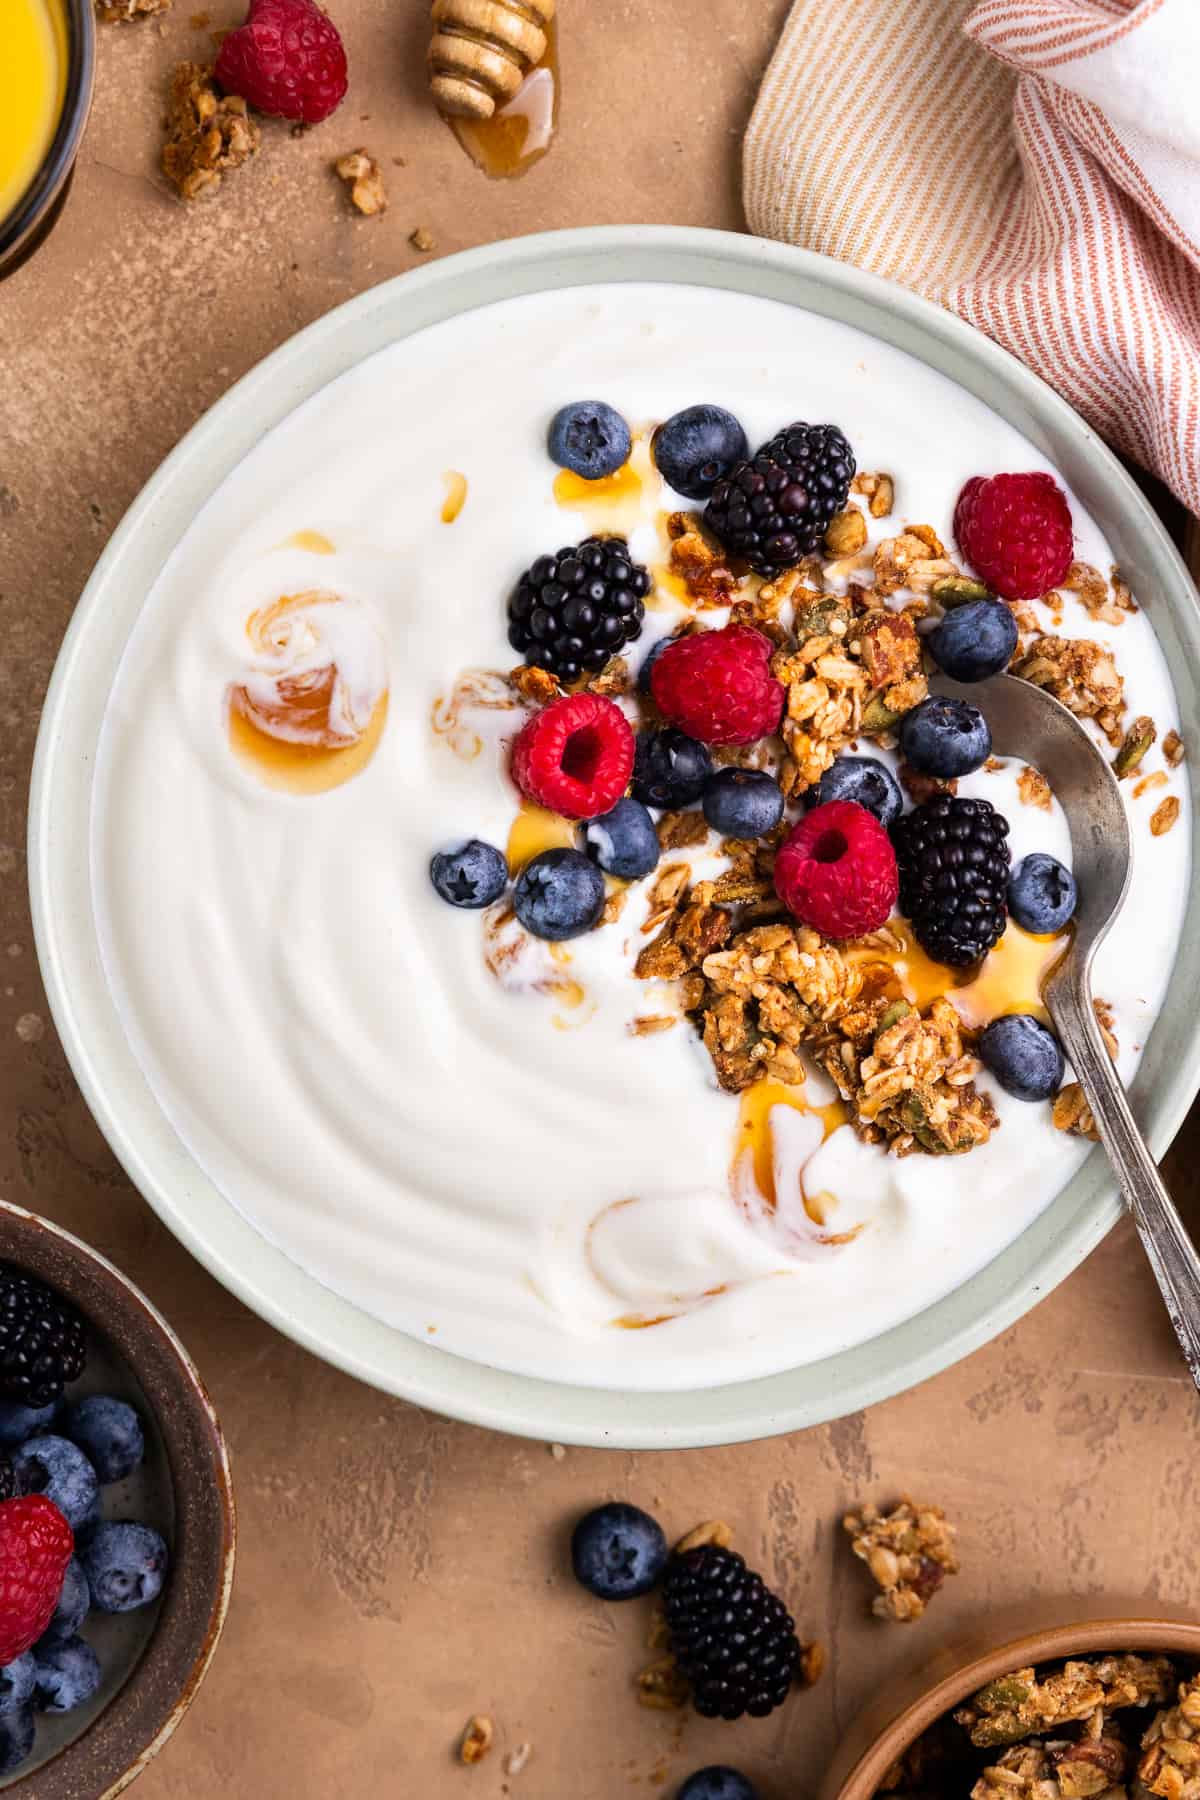
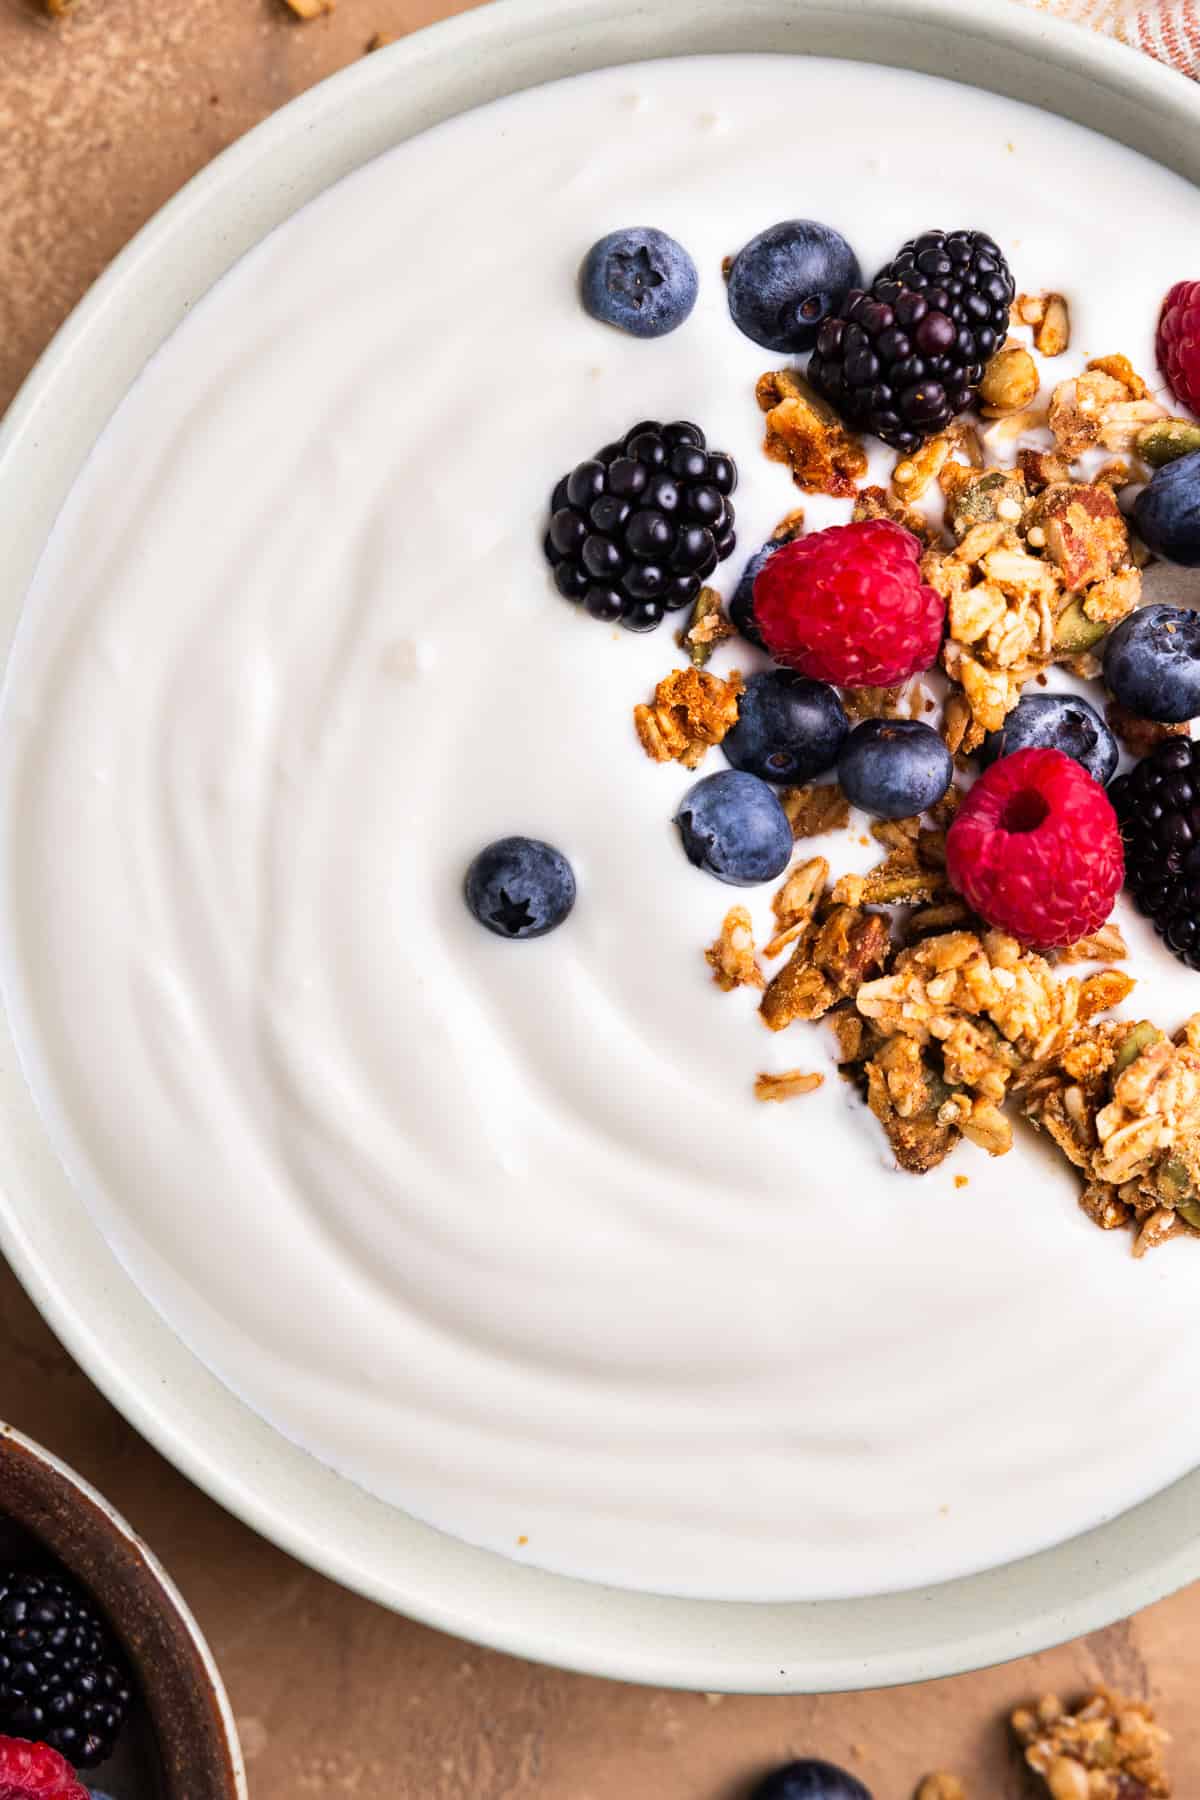
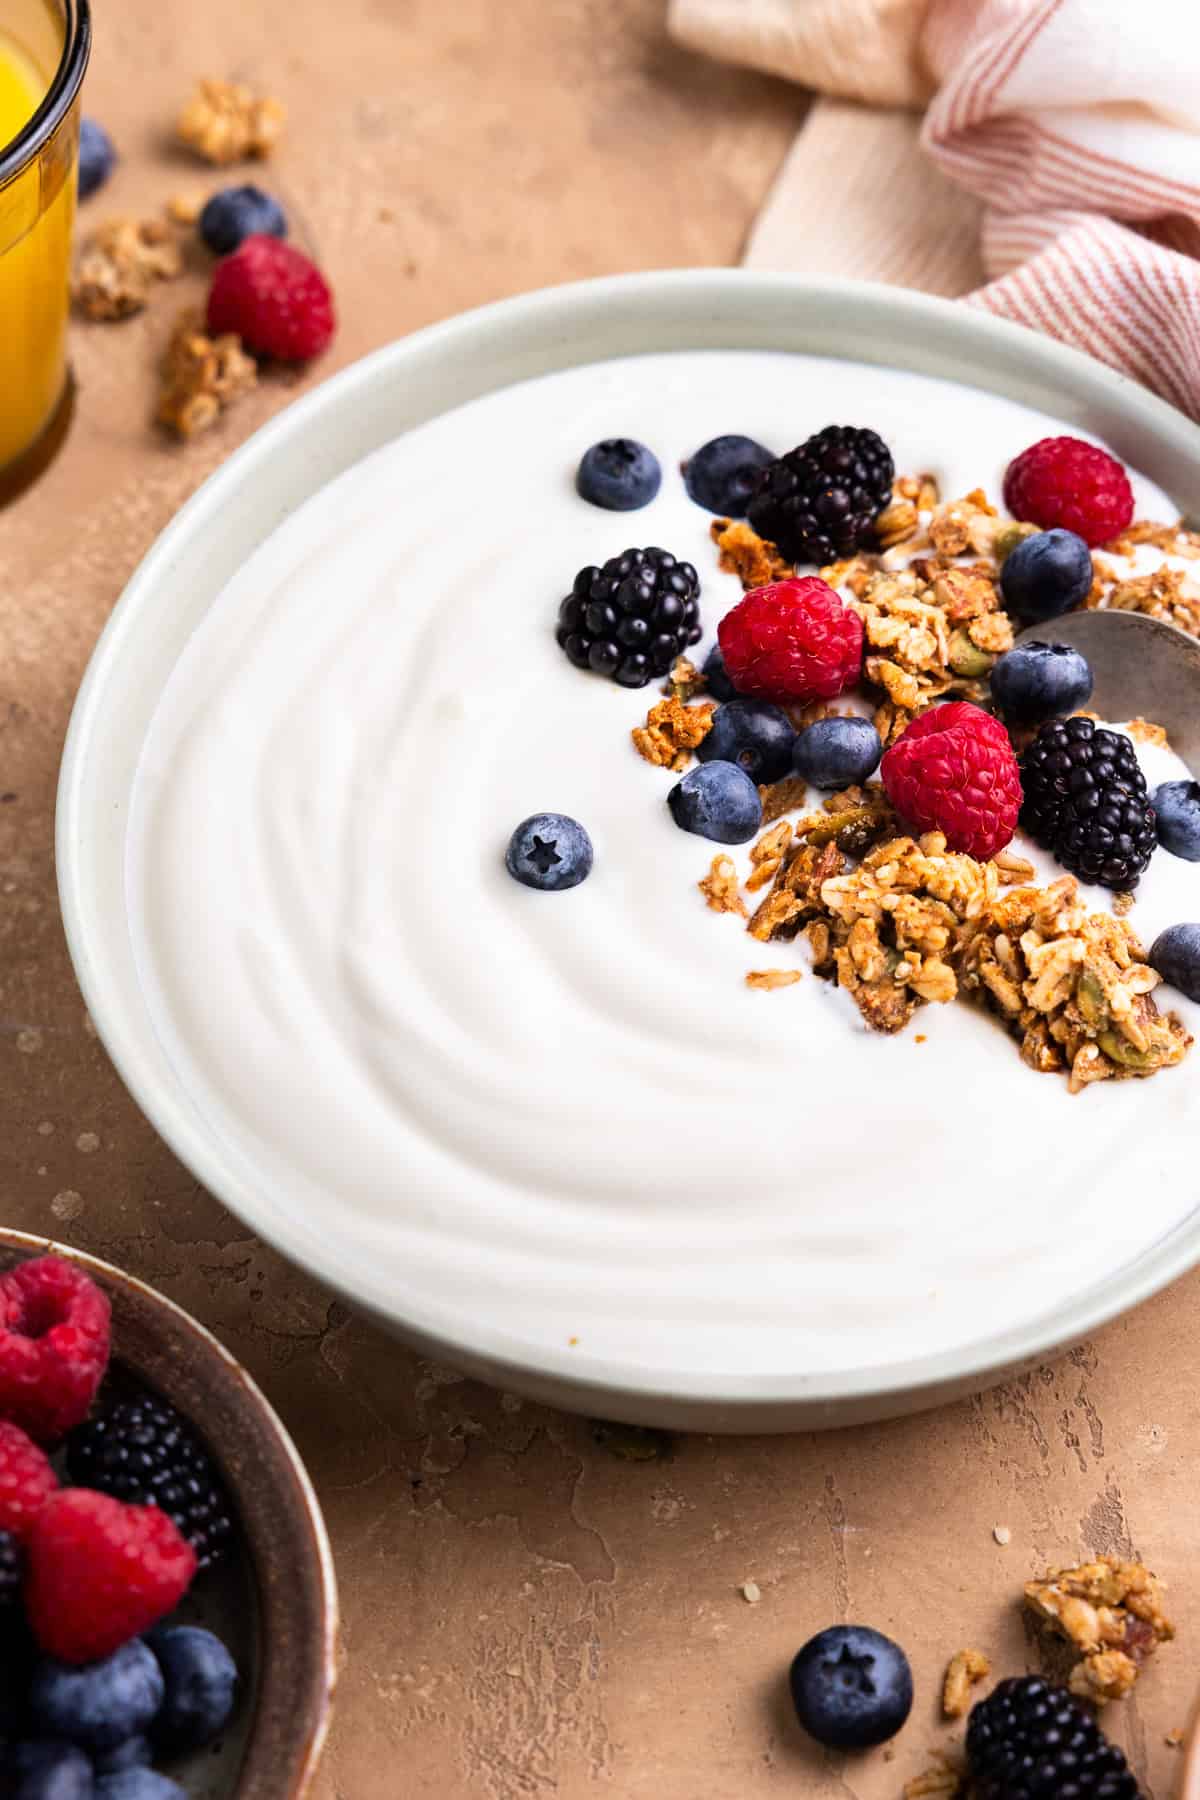
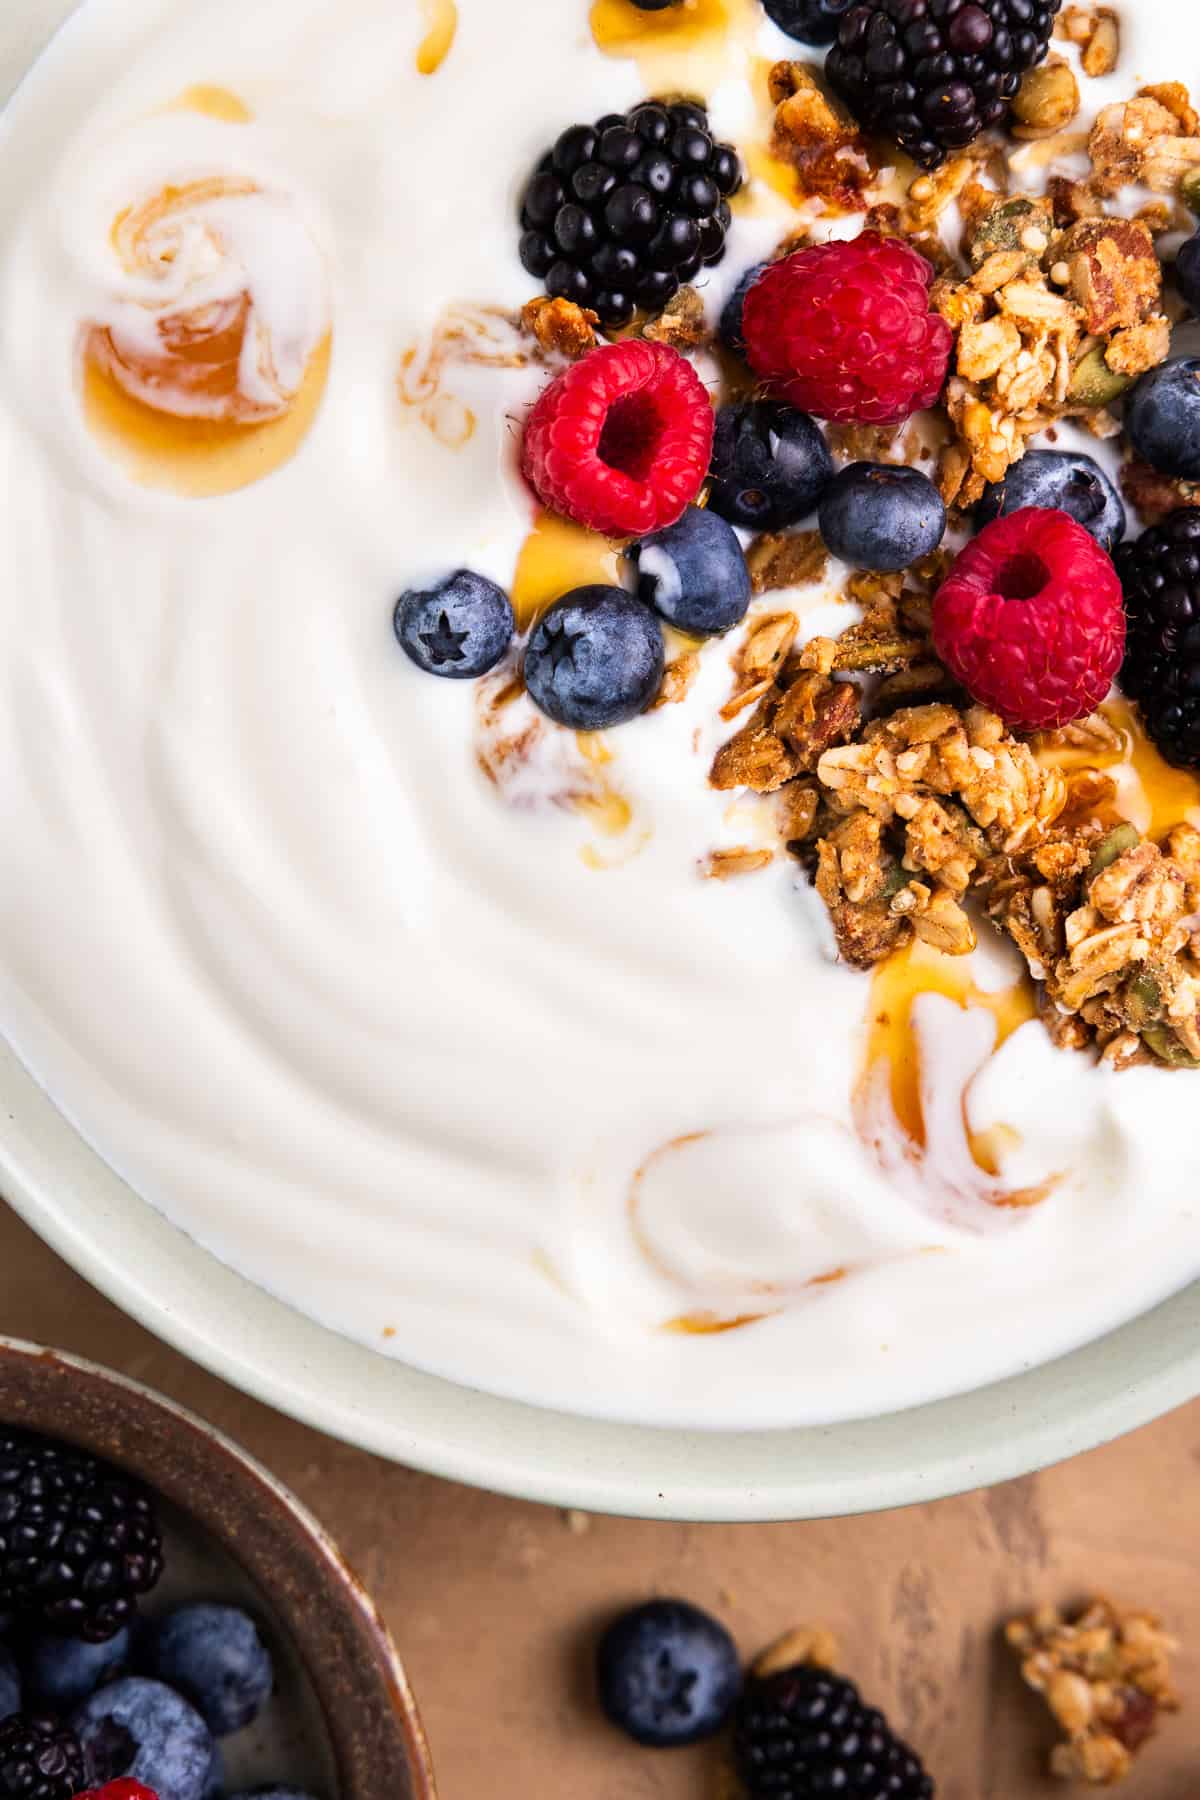
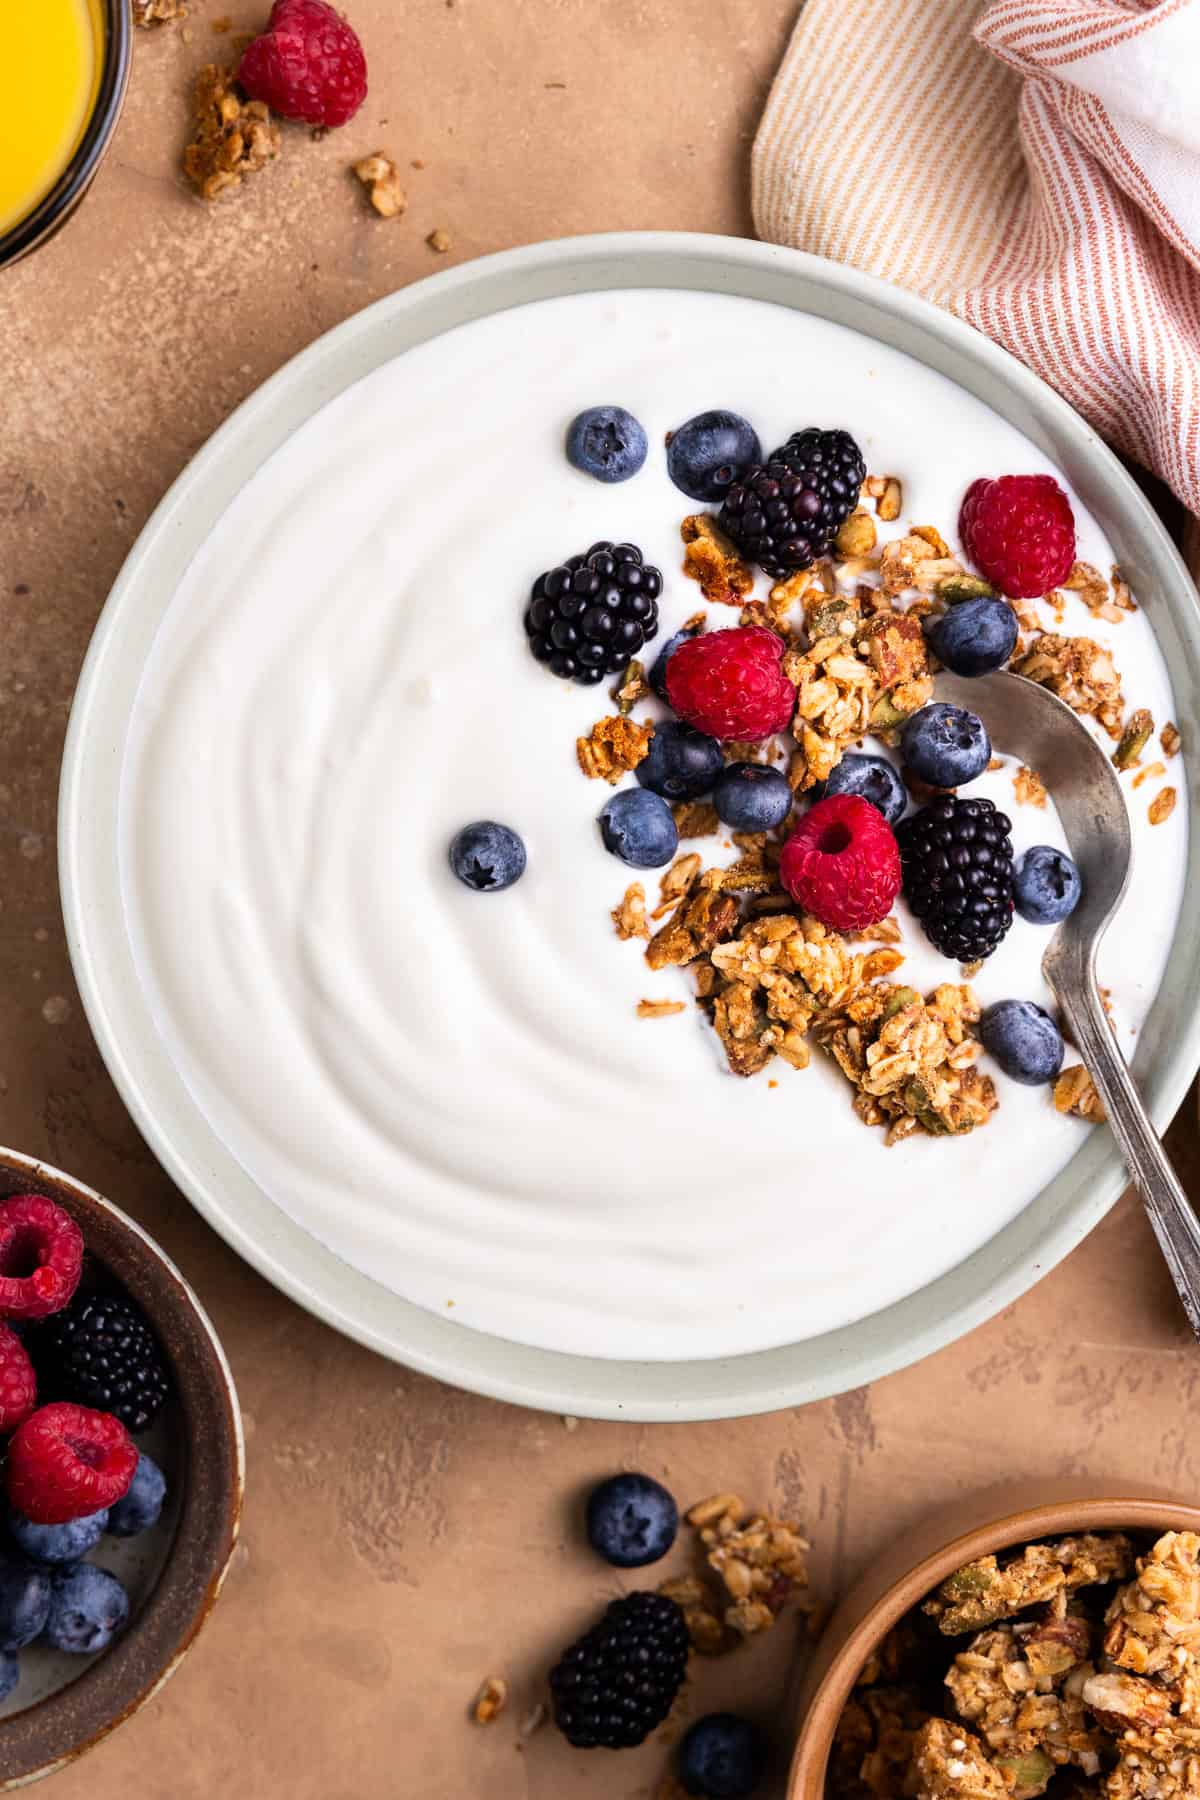
My favorite yogurt toppings
The best part about a bowl of yogurt is all the fun and delicious toppings!
- Honey or maple syrup. Raw honey or real maple syrup can't be beat.
- Jam. Homemade or a good quality store-bought jam is a fun way to add flavor and sweetness.
- Fresh or frozen fruit. We love adding frozen wild blueberries, especially my toddler. Fresh fruit is always delicious too, like berries, oranges, pears or whatever is in season.
- Granola. Always, always add granola. We're addicted to my homemade sourdough discard granola.
- Nuts and seeds. Almonds, walnuts, chia seeds, or pumpkin seeds are all great options.
- Nut butter. Almond or peanut butter for a little extra protein and creaminess.
- Cinnamon. We love adding Ceylon cinnamon, a milder cinnamon known for its beneficial antioxidants.


Did you try this recipe?
I'd love to hear from you! Leave a ⭐️⭐️⭐️⭐️⭐️ rating and comment below. I appreciate your helpful feedback! Follow me on Instagram, TikTok, Facebook and Pinterest for more delicious recipes!
Thanks so much! - Rachel
Instant Pot Yogurt Recipe (Easy Step-by-Step Guide)
Equipment
- Fine mesh strainer optional
- Cheesecloth optional
Ingredients
- 1 gallon whole milk
- ¼ cup plain full fat yogurt with active cultures
Instructions
- Heat the milk. Pour the milk into the Instant Pot. Press the "yogurt" button until the display reads "boil." Place the lid on (it can be set to sealing or venting) and allow the milk to heat until the cycle is complete - the Instant Pot will beep. Using an instant-read thermometer, check that the milk has reached 180-200°F. If not, repeat the cycle, checking occasionally, until the milk reaches the desired temperature.
- Cool the milk. Remove the inner pot from the Instant Pot and let the milk cool to about 110°F - if it's too hot, it can kill the beneficial bacteria. This can take up to 2 hours. To speed up the process, place the pot in an ice water bath. Stir the milk occasionally and use an instant-read thermometer to check the temperature.
- Add the starter. Add the yogurt starter directly to the cooled milk and whisk to fully combine.
- Incubate. Place the inner pot back into the Instant Pot and cover with the lid (it can be set to sealing or venting). Press the "yogurt" button and set timer for 8 hours. You can adjust the time up to 12 hours for a thicker, tangier yogurt. Let the yogurt ferment undisturbed until the time is up. Once finished, the yogurt should be set, holding together as one mass with a slight jiggle.
- Chill. Once the yogurt is done fermenting, remove the inner pot, cover with a lid or plastic wrap, then transfer to the fridge. Let chill for a few hours or overnight to fully set and thicken.Note: Homemade yogurt can be slightly lumpy. After it has chilled in the fridge, you can give it a good whisk to smooth it out.
- Strain (optional). For thicker, Greek-style yogurt, strain the yogurt. Place a fine mesh strainer lined with cheesecloth over a large bowl. Transfer to the fridge and let it strain for 3-6 hours, depending on how thick you'd like it. Note: Don't discard the whey - use it to make my easy fermented whey soda, a naturally fizzy, probiotic drink.
- Store. Transfer the yogurt to glass mason jars (or another airtight container) and store in the fridge for up to 2 weeks. If any liquid (whey) separates on top, simply stir it back in before serving.Note: Set aside a ¼ cup of yogurt to use as a starter for your next batch. Store it in the fridge - I like to keep mine in a small mason jar.
Notes
Why didn't my yogurt set?
- This is usually due to inactive starter cultures or incorrect temperatures. Make sure you're using a plain yogurt without any additives and that contains live cultures, and that the milk is heated to 180°F then cooled to 110°F before adding the starter.
Tips for success:
- Clean your Instant Pot. If your instant pot smells like something you previously cooked (like a savory dish such as Instant Pot Pork Roast), it's a good idea to give it a thorough cleaning. You can wash it well with soap, or add 1 cup of water and 1 cup of white vinegar to the pot. Seal and set to high pressure for 2 minutes. Rinse well and you're ready to go. You can also leave the sealing ring off when making the yogurt to prevent any lingering odors from affecting the flavor.
- Use fresh starter. For best results, use yogurt with active cultures that's fresh and hasn't been sitting open in the fridge too long.
- Heat the milk to 180°F. Heating the milk to 180°F helps change the structure of the proteins so the yogurt thickens properly and has a smoother, creamier texture.
- Cool to 110°F before adding starter. If the milk is too hot, it can kill the beneficial bacteria.
- Leave it undisturbed. Once the yogurt is fermenting, avoid moving, jostling or mixing the yogurt so it can set properly.
How to store:
- Store your homemade yogurt in an airtight container in the fridge for up to 2 weeks. I like to use glass mason jars.
- As the yogurt sits, liquid (whey) may separate on top. Simply stir it back in before serving.
- Set aside a ¼ cup of yogurt to use as a starter for your next batch. Store it in the fridge - I like to keep mine in a small mason jar.
Nutrition
Nutritional information is automatically calculated by a third party software and is only an estimate, not a guarantee. This information is provided as a courtesy, and you are solely responsible for all decisions related to your health.


Rachel Kochlin says
My family absolutely loves this homemade yogurt, especially my toddler! He eats it every single morning. As a mom, not only do I love it because of the health benefits, but it's easy to make and far cheaper than buying yogurt. I make a fresh batch of every 2-3 weeks.