Sourdough chocolate chip cookies are pure perfection! They're easy to make, with a soft, chewy center, golden-brown edges, and a rich, nutty, caramel-like depth from brown butter and dark brown sugar. Sourdough discard adds tenderness and flavor, while two types of chocolate create the ultimate indulgence. Each bite is the perfect balance of crisp, gooey, and decadent.

I love experimenting with sourdough discard, and I just knew I had to create my dream sourdough chocolate chip cookie. One that is rich, gooey, chewy and tender, not at all cakey, and doesn't require the use of an electric mixer. Mission accomplished.
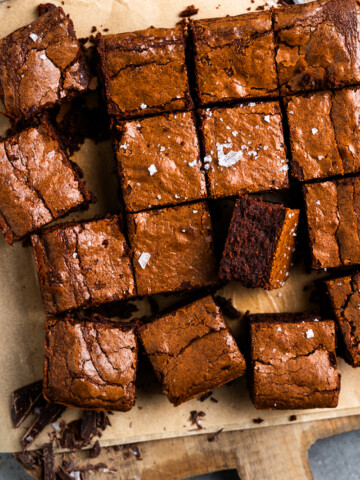
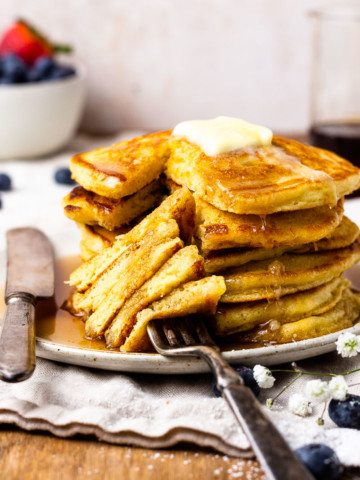
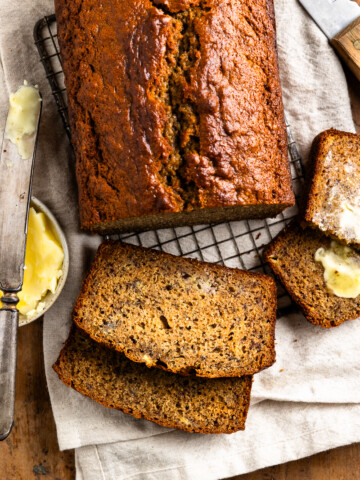
Lately, when feeding my sourdough starter, I always feed a bit extra so I have lots of discard because baking with sourdough discard is my favorite! Next, you have to try my fudgy brown butter sourdough brownies, chocolate chip sourdough banana muffins, and fluffy sourdough discard pancakes - truly, you will never go back to making regular pancakes again!
Jump to:
Why you'll love sourdough chocolate chip cookies
- Incredibly flavorful. We're talking brown butter, sourdough discard, dark brown sugar and two types of chocolate! These cookies are packed with flavorful ingredients! Brown butter adds this subtle nutty, caramel flavor - that combined with dark brown sugar, it's irresistible! The sourdough discard creates a soft cookie with beautifully complex flavor and using both milk and semi-sweet chocolate is the best of both worlds!
- Easy to make. This recipe doesn't require any mixers other than a good old fashioned hand whisk - I love that because it's less time and less mess to clean up! Aside from the 10 minutes you'll need to brown the butter, the cookie dough comes together really quickly. The hardest part is letting the dough chill in the fridge, but trust me, it's worth it!

Ingredients
These cookies are made using simple pantry-staple ingredients.
See recipe card for full ingredient list and measurements.

Ingredient notes
- Salted butter. I've always been a salted butter girl, even when it comes to baking. Salt = flavor. But if you prefer unsalted, that is perfectly fine.
- Dark brown sugar. I like the deeper, more complex flavor and extra moisture that you get from dark brown sugar, but don't panic if you only have light brown sugar - that will work too.
- Egg + egg yolk. We are using both 1 egg and 1 egg yolk. While using a whole egg helps with the structure of the cookie, egg whites are comprised mostly of water, and since our sourdough discard already contains quite a bit of water, we don't want to use two whole eggs. Instead, we are just adding an extra egg yolk, which is higher in fat, giving us a richer, fudgier dough.
- Sourdough discard. Discard that's been sitting in the fridge and no longer active. We are not using active starter here. My starter and discard is made with a 1:1 ratio of flour to water.
- Salt. I typically use sea salt - either Redmond or pink Himalayan.
- Chocolate. I like using both milk and semi-sweet chocolate (or even dark chocolate) because they both truly add their own flavor and texture. You'll notice that milk chocolate actually holds its shape a bit more than semi-sweet or dark chocolate. But if you prefer, you can use one or the other - just be sure to use a total of 8 ounces or 1 ½ cups.
Substitutions and variations
- Brown butter. I highly recommend using brown butter because it truly adds so much flavor! Browning butter also cooks off about 1 tablespoon of water per stick of butter, which helps to create the perfect cookie texture since sourdough starter is 50% water. If you would like to skip the browning, you can try using 185 grams of melted butter. And if you love brown butter as much as I do, you have to try my fudgy brown butter sourdough brownies!
- Chocolate. When it comes to chocolate chip cookies, I actually prefer to chop up chocolate bars because they melt more smoothly into cookies creating little pockets of gooey decadent chocolate, but you can certainly chocolate chips if that's what you have on hand! Chocolate chips are typically made with emulsifiers so they hold their shape and don't melt as well, which will actually create a thicker cookie.
- Mix-ins. Feel free to experiment with adding ½ cup of chopped nuts, (pecans or pistachios would be great), toasted coconut, chopped pretzel twists, or toffee bits! If you add anymore than ½ cup, I would reduce the amount of chocolate so you're not overstuffing the cookie dough.
This recipe hasn't been tested with substitutions or variations. If you make any changes or additions, I'd love to hear how it turned out-drop a comment below!
How to make sourdough chocolate chip cookies
See recipe card for full instructions.

- Step 1: Brown the butter. Melt butter over medium heat, stirring frequently for about 7-10 minutes. As the butter cooks, it will start to bubble and foam. Continue cooking and stirring until the butter turns golden brown with little browned bits on the bottom of the pan.

- Step 2: Combine wet ingredients. Add brown sugar, granulated sugar, and cooled brown butter to a bowl. Whisk for a minute until fluffy and lighter in color, then whisk in the egg, egg yolk, sourdough discard, and vanilla.

- Step 3: Add the dry ingredients. Whisk the flour, baking soda, and salt in a separate bowl. Add the flour mixture and chopped chocolate to the bowl with the wet ingredients.

- Step 4: Fold to combine. Using a rubber spatula, fold the dry ingredients into the wet ingredients until just combined.

- Step 5: Chill the dough then scoop. Cover cookie dough and refrigerate overnight or at least 1 hour. Scoop 3 tablespoons of dough at a time (I like using a cookie scoop) and place the dough balls on a parchment-lined baking sheet, spacing them 2-3 inches apart.

- Step 6: Bake. Bake 10-11 minutes until the edges are lightly golden and the centers still look gooey and pale. Remove from the oven and immediately sprinkle with flakey sea salt. Let the cookies rest for 2-3 minutes before transferring to a cooling rack.
Expert tips
- Don't over mix the dough. One of the reasons this recipe just uses a whisk (as opposed to a hand mixer or stand mixer) is that we want to cream together the sugar and butter just enough until light and fluffy, but we don't want to overdo it with an electric mixer, which would add more air into the dough resulting in cakey cookies. You also want to avoid over-mixing when you add the flour. You just want to fold the flour into the dough until just combined and no steaks of flour remain. Over-mixing once you add the flour can lead to a tough, dense cookie.
- Chill the dough overnight. I get it - once you mix up the dough, you just want to bake the cookies! But plan ahead because it's worth the wait - even if it's just a couple hours. First of all, this is a very soft, wet dough, so chilling the dough is very important to allow the flour to fully hydrate and the butter to firm up, preventing the dough from spreading too much while baking and giving you the best texture. And secondly, chilling the dough gives the flavors time to marry, resulting in the most flavorful cookies!
- Use a large cookie scoop. In my opinion, every household should have cookie scoops! They're like an ice cream scoop but smaller. I use them all the time, and not just for cookies - they're great evenly scooping muffin batter (like my sourdough discard banana muffins), biscuit dough, sourdough pancake batter, meatballs, etc. I have a 3-pack cookie scoop, which comes with 3 different sizes: 1 tablespoon, 2 tablespoon, and 3 tablespoon. It makes scooping evenly portioned cookie dough a breeze. For this recipe, I like to use the 3 tablespoon scoop.
- Scooping cold dough: Cold dough can be a little tricky to scoop and squeeze out of a cookie scoop - it takes a little patience. After I scoop the dough, I use my hands/fingers to pack the dough in the scoop and flatten it out. If you have room in your fridge, you can scoop and portion the door BEFORE chilling in the fridge. Keep covered with plastic wrap until you're ready to bake.
- Don't over bake the cookies! I feel like over-baking is biggest mistake people make when baking cookies. You want to remove the cookies from the oven when they still look under baked! The centers will look pale, gooey and puffy and the edges will be lightly golden brown. As the cookies rest outside of the oven, they will continue to firm up a bit and continue cooking from residual heat.
- For perfectly round cookies with crinkly edges: Immediately after removing the cookies from the oven, grab a mug with a large opening and place it upside down over each cookie and gently move it in a circular motion to shape the cookie. Another option is to use a fork to gently reshape the edges of each cookie into a circle.

Recipe FAQs
Sourdough cookies can be a healthier option compared to regular cookies. Long fermenting the dough helps to break down the gluten and starches in flour, making it easier to digest and less likely to spike blood sugar levels because of their lower glycemic index. Sourdough fermentation also neutralizes phytic acid, making the nutrients in flour, like magnesium, calcium, and iron, more bioavailable. But, please keep in mind that sourdough cookies still contain sugar, and should be enjoyed in moderation.
No at all! Sourdough discard adds extra moisture, gives the cookies a more complex flavor, and helps to weaken the gluten creating perfectly soft and tender cookies.
You can refrigerate the dough for up to 36 hours.
How to store and freeze
Storage
Store cookies in an airtight bag or container at room temperature for up to one week.
Freezing cookie dough
I love freezing cookie dough so that when I have a craving for a warm, fresh baked cookie, I can just pop a few cookie dough blobs on a sheet pan and bake!
- Once the dough has chilled in the fridge for at least 30 minutes and firmed up enough to scoop, portion the dough balls and place on a parchment-lined baking sheet or plate. Transfer to the freezer to flash freeze for 30 minutes.
- Place the dough balls in a freezer-safe bag or air-tight container. Freeze up to 3 months.
- When you're ready, remove as many dough balls as you would like from the freezer and place on a parchment lined baking sheet. Let them warm up a bit while you preheat the oven, then bake as directed in the recipe card - you'll just need to add a few extra minutes to the baking time. Alternatively, let the dough balls thaw in the fridge overnight (keep them covered) and bake according to the original directions.
Freezing baked cookies
To freeze already baked cookies, let them cool completely then transfer to a freezer-safe bag or airtight container and freeze up to 3 months. If you desired, you can place little squares of parchment paper between each cookie so they don't stick together - this is nice if you want to pull just a couple cookies from the freezer at a time. To eat, let rest at rom temperature in an airtight bag or container until soft.


Did you try this recipe?
I'd love to hear from you! Leave a ⭐️⭐️⭐️⭐️⭐️ rating and comment below. I appreciate your helpful feedback! Follow me on Instagram, TikTok, Facebook and Pinterest for more delicious recipes!
Thanks so much! - Rachel
Brown Butter Sourdough Chocolate Chip Cookies
Ingredients
- 227 grams salted butter 1 cup
- 224 grams dark brown sugar 1 packed cup
- 100 grams granulated sugar ½ cup
- 1 egg about 50 grams
- 1 egg yolk about 15 grams
- 125 grams sourdough discard ½ cup
- 15 grams vanilla extract 1 tablespoon
- 285 grams all-purpose flour about 2 ¼ cups
- 1 teaspoon baking soda about 8 grams
- ¾ teaspoon salt about 6 grams
- 113 grams semi-sweet chocolate bar chopped (4 oz or ¾ cup)
- 113 grams milk chocolate bar chopped (4 oz or ¾ cup)
- Flakey sea salt for finishing, optional
Instructions
- Start by browning the butter. Melt the butter in a small saucepan over medium heat, and continue heating the butter, stirring frequently for about 7-10 minutes. As the butter cooks, it will start to bubble and foam. Continue cooking and stirring until the butter turns golden brown with little browned bits on the bottom of the pan. Remove from the heat and transfer to a bowl - you should have about 185-190 grams of brown butter. Make sure you get all those browned bits! Place in the freezer to cool to the touch for about 10-15 minutes.
- Add the brown sugar, granulated sugar, and cooled brown butter to a large bowl. Whisk for a minute until fluffy and lighter in color. Add in the egg, egg yolk, sourdough discard, and vanilla. Whisk for another minute until well combined.
- Whisk the flour, baking soda, and salt in a separate bowl. Add the flour mixture and chopped chocolate to the bowl with the wet ingredients. Using a rubber spatula, fold the dry ingredients into the wet ingredients until just combined. Do not overmix.
- Scoop the dough into 3 tablespoon-size balls (I like using a cookie scoop), cover, and refrigerate overnight or at least 2 hours. Alternatively, you can refrigerate the dough, then scoop right before baking.Note: Chilling the dough allows the flour to fully hydrate, the butter to solidify, and the flavors to come together. If you bake room-temperature dough, the cookies will spread too much.
- Preheat the oven to 350°F and line baking sheets with parchment paper.
- Place the dough balls on the parchment-lined baking sheet, spacing them 2-3 inches apart. If desired, you can add a few pieces of chopped chocolate to the tops of each cookie.
- Bake for 10-11 minutes until the edges are lightly golden and the centers still look gooey and pale. Remove from the oven and immediately sprinkle with flakey sea salt. Let the cookies rest for 2-3 minutes before transferring to a cooling rack.
Notes
Helpful Tips
- Don't over bake the cookies! Remove cookies from oven when they still look under baked! The centers will look pale, gooey and puffy and the edges will be lightly golden brown. As the cookies rest outside of the oven, they will continue to firm up and cook from residual heat.
- Scooping cold dough: Cold dough can be a little tricky to scoop and squeeze out of a cookie scoop - it takes a little patience. After I scoop the dough, I use my hands/fingers to pack the dough in the scoop and flatten it out. If you have room in your fridge, you can scoop and portion the door BEFORE chilling in the fridge. Keep covered with plastic wrap until you're ready to bake.
- For perfectly round cookies with crinkly edges: Immediately after removing the cookies from the oven, grab a mug with a large opening and place it upside down over each cookie and gently move it in a circular motion to shape the cookie. Another option is to use a fork to gently reshape the edges of each cookie into a circle.
Substitutions and variations
- Chocolate: When it comes to chocolate chip cookies, I actually prefer to chop up chocolate bars because they melt more smoothly into cookies creating little pockets of gooey decadent chocolate, but you can certainly chocolate chips if that's what you have on hand! Chocolate chips are typically made with emulsifiers so they hold their shape and don't melt as well, which will actually create a thicker cookie.
- Mix-ins: Feel free to experiment with adding ½ cup of chopped nuts, (pecans or pistachios would be great), toasted coconut, chopped pretzel twists, or toffee bits! If you add anymore than ½ cup, I would reduce the amount of chocolate so you're not overstuffing the cookie dough.
Storing and freezing
- Room temperature: Store cookies in an airtight bag or container at room temperature for up to one week.
- Freezing baked cookies: Cool completely then transfer to a freezer-safe bag or airtight container and freeze up to 3 months.
- Freezing cookie dough:
- Once the dough has chilled in the fridge for at least 30 minutes and firmed up enough to scoop, portion the dough balls and place on a parchment-lined baking sheet or plate. Transfer to the freezer to flash freeze for 30 minutes.
- Place the dough balls in a freezer-safe bag or air-tight container. Freeze up to 3 months.
- When you're ready, remove as many dough balls as you would like from the freezer and place on a parchment lined baking sheet. Let them warm up a bit while you preheat the oven, then bake as directed in the recipe card - you'll just need to add a few extra minutes to the baking time. Alternatively, let the dough balls thaw in the fridge overnight (keep them covered) and bake according to the original directions.
Nutrition
Nutritional information is automatically calculated by a third party software and is only an estimate, not a guarantee. This information is provided as a courtesy, and you are solely responsible for all decisions related to your health.


Shelby says
Oh my goodness… so, so good! I ate three cookies right out of the oven and immediately had to leave a review. I’ve never been able to master cookies, but these came out perfect! The consistency and flavor are *chef’s kiss*. This will be my go to cookie recipe! (Also appreciate you posting both cups and metrics :))
Rachel Kochlin says
Oh my gosh, this is the best compliment!! I'm so happy that you love the cookies. I truly appreciate you giving my recipe a try and leaving such a kind review! Thank you, Shelby!
Ariel says
hello! would i need to adjust any other measurements if i leave out the sourdough starter? (i accidentally killed my starter last week and this is my favorite cookie recipe)
Rachel Kochlin says
Ohhh no! What a bummer. The recipe should work just fine without sourdough discard. If you try it, I'd love to know how they turn out. I'm so happy this is your favorite cookie recipe! 🥹
Livia says
Excellent recipe, made a batch today and they turned out fantastic! Thank you!
Rebecca Skidmore says
These cookies were absolutely delicious! My only question is -what can i do to help them be less greasy? The taste was amazing but they looked greasy on the bottom.
Rachel Kochlin says
I'm so glad you love the cookies!! Couple things to note. Make sure you're fully chilling the dough to solidify the butter. I'd recommend leaving it in the fridge overnight before baking. If you're still finding them too greasy/buttery for your liking, you can try increasing the flour to 2 1/2 cups and/or adding 1 teaspoon of cornstarch or arrowroot powder in with the dry ingredients. Hope this helps!
Cayla says
This recipe is a winner! We are on our 3rd batch and loving these cookies. Precious recipies didn’t work out as good and part of it I think was over mixing. I also didn’t understand properly browning butter. This is gooden
Rachel Kochlin says
Cayla, that makes me so happy to hear! I love that you're already on your third batch! Brown butter can feel tricky at first, so I'm glad this recipe helped make it click. Thanks so much for sharing your experience and leaving a review!
Ho McCoy says
When I baked the 3TBS version, I kept adding time and got up to 30 minutes, and I couldn't get the center cooked. I used 1 TBS to bake, and that worked at 15 minutes time. Crunchy edges, and chewy center. You REALLY taste the brown butter. I will try next time with milk and semi mix. I had a giant bag of semi, so used only that. Thanks for posting.
Rachel Kochlin says
Thanks so much for the 5 stars and giving the recipe a try! I like my cookies a little underbaked and gooey in the center, so the larger size is meant to stay soft inside. Also, keep in mind that they continue to set up as they cool. But, I'm glad the 1 tablespoon version worked well for you! Brown butter + chocolate is always a win!
JNR says
This is the BEST cookie I have ever had, & I am not just saying that. My neighbor made them for me, & I needed the recipe immediately. Definitely a keeper recipe!
Rachel Kochlin says
This just made my day!! I'm so glad you enjoyed the cookies enough to hunt down the recipe - truly the best compliment! Thanks so much for sharing your sweet review!
Kristi Johnson says
Followed recipe exactly by weights and the cookies were so flat. I’m guessing it’s maybe not high altitude friendly? Felt like a lot of effort for frisbees 😅 I had high hopes.
Rachel Kochlin says
Kristi, sorry the recipe didn't work out for you. I live in Minnesota, so this recipe certainly wasn't tested for high altitude. As you can see from the pictures, these are thinner cookies, but they are also very soft and chewy - not at all frisbees. Sounds like you may need to adjust your oven temperature for high altitude or maybe you over baked them.
Kate says
These cookies are so so tasty, just as good as a gourmet bakery . Literally the best chocolate chip cookies I’ve ever eaten🍪💗.
I would say cookie shop worthy.
Rachel Kochlin says
Oh my gosh!! This is the sweetest compliment! 🥹 Thank you so much for giving my recipe a try and leaving a review! Appreciate you 🫶🏼
Michele Smith says
Lovely recipe but I didn’t see a baking temp. Maybe I missed it?
Rachel Kochlin says
Thank you for bringing that to my attention! I updated the recipe with the baking temperature!
Kelly Kochlin says
Rachel,
Everything you make gets a FIVE star rating!
Your favorite Mother in law 😉
Rachel Kochlin says
Thanks, Kelly! ☺️
Rachel Kochlin says
Truly my dream chocolate chip cookie! They're perfectly chewy, gooey and soft with crispy golden-brown edges and pools of melty chocolate. The brown butter adds so much flavor and the sourdough discard helps to make the cookies deliciously tender. There are some sourdough cookie recipes out there that are just too cakey for me, but these are far from!